Watch the video
The Basics
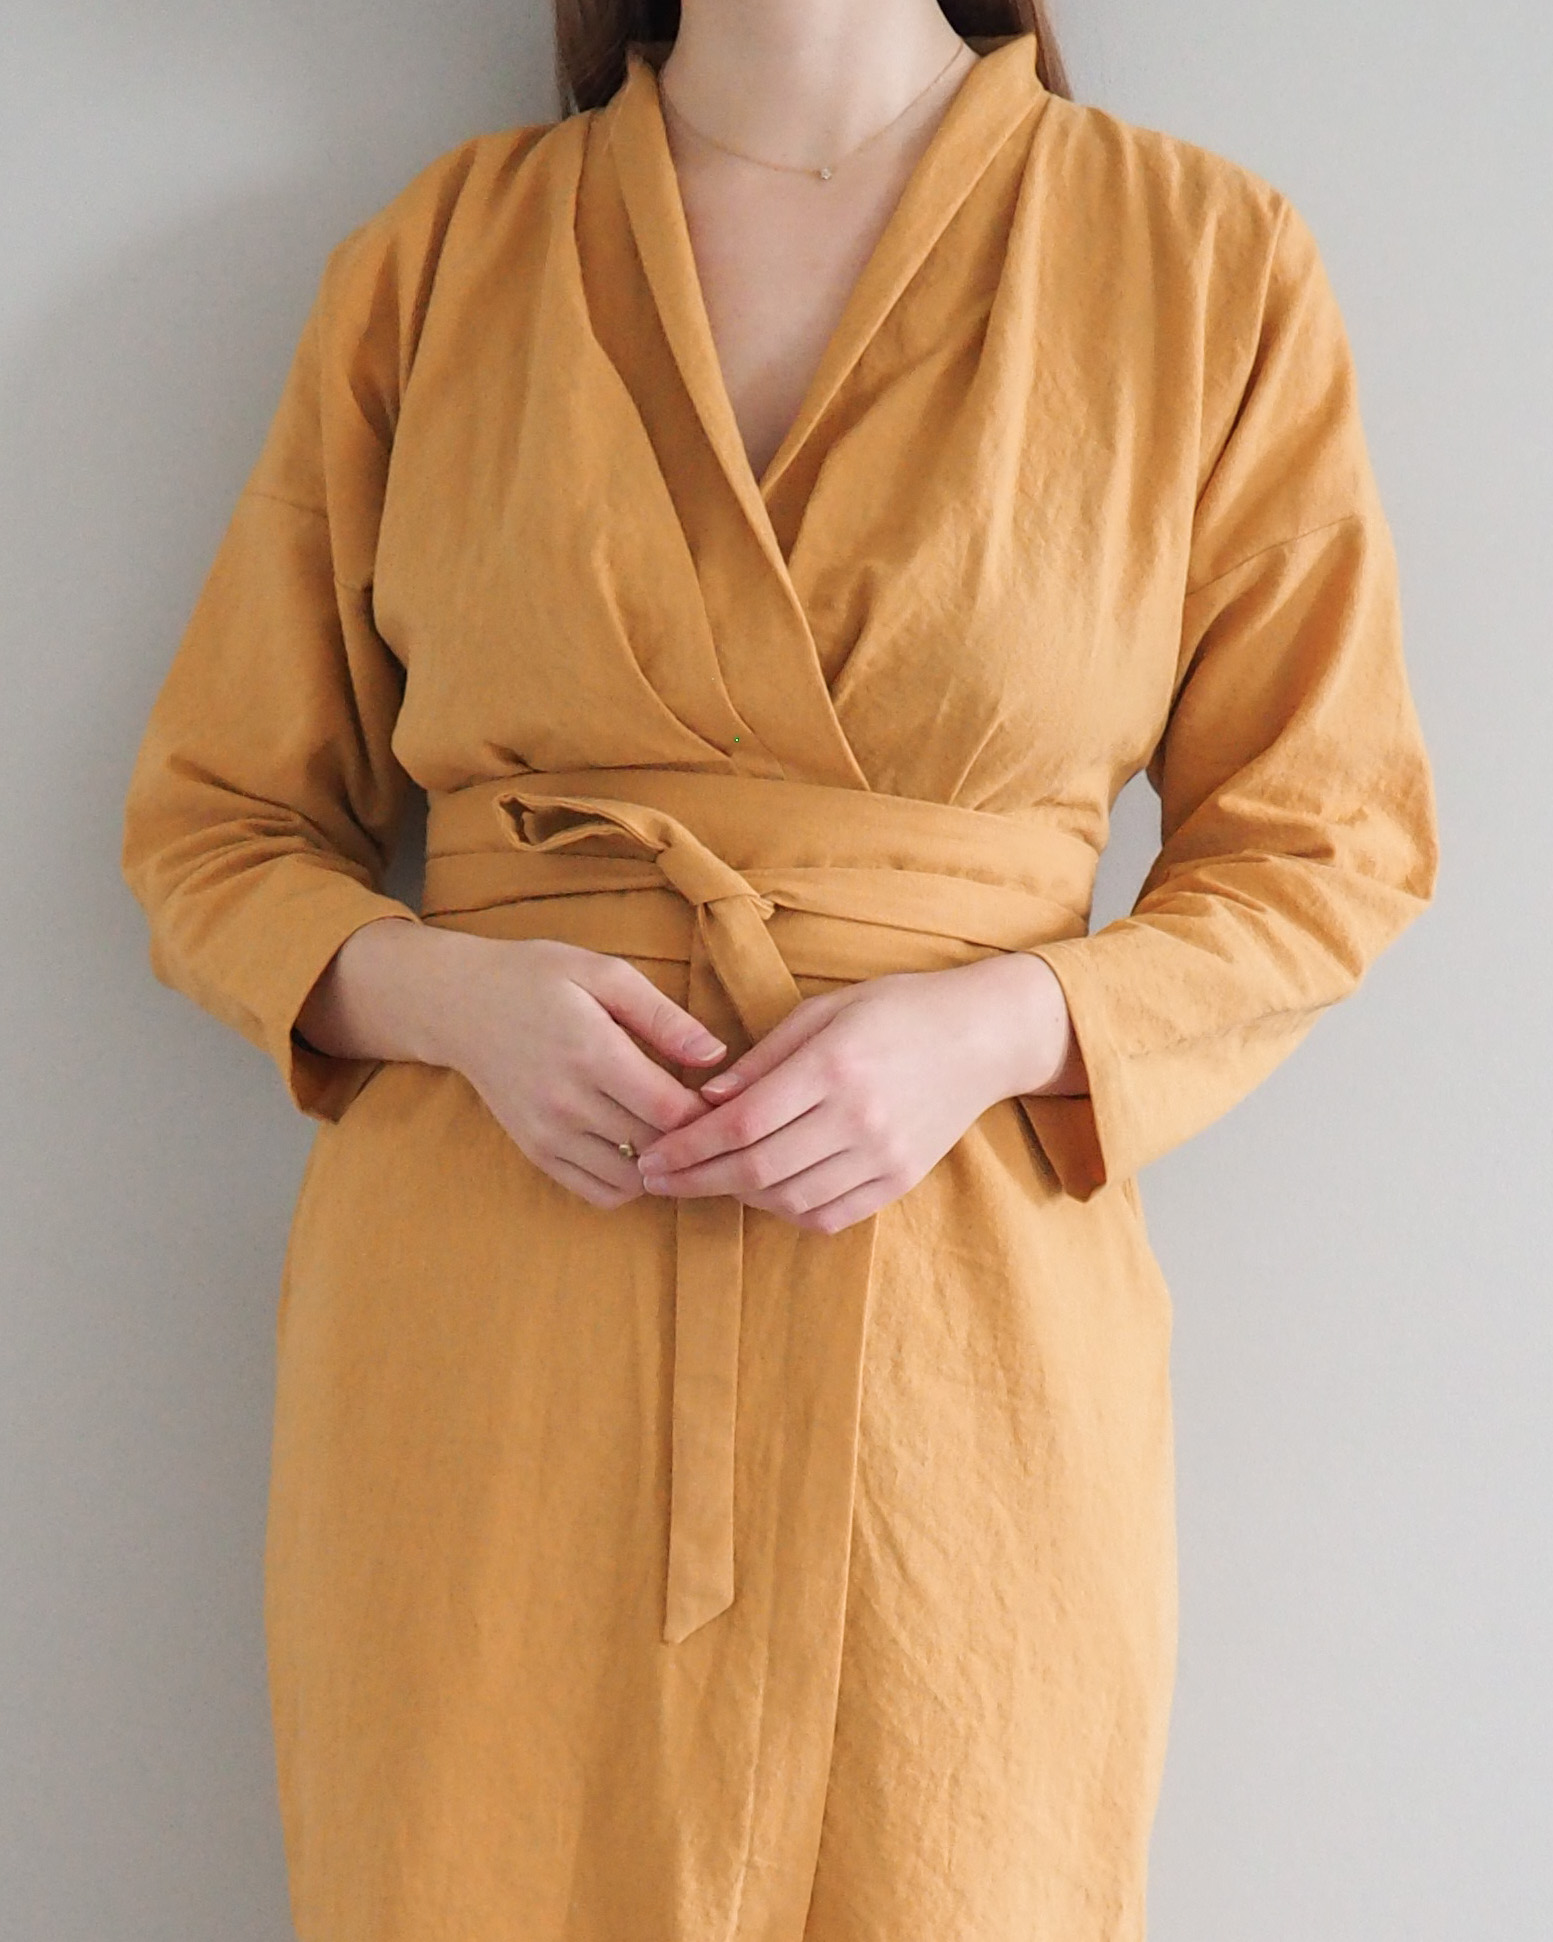
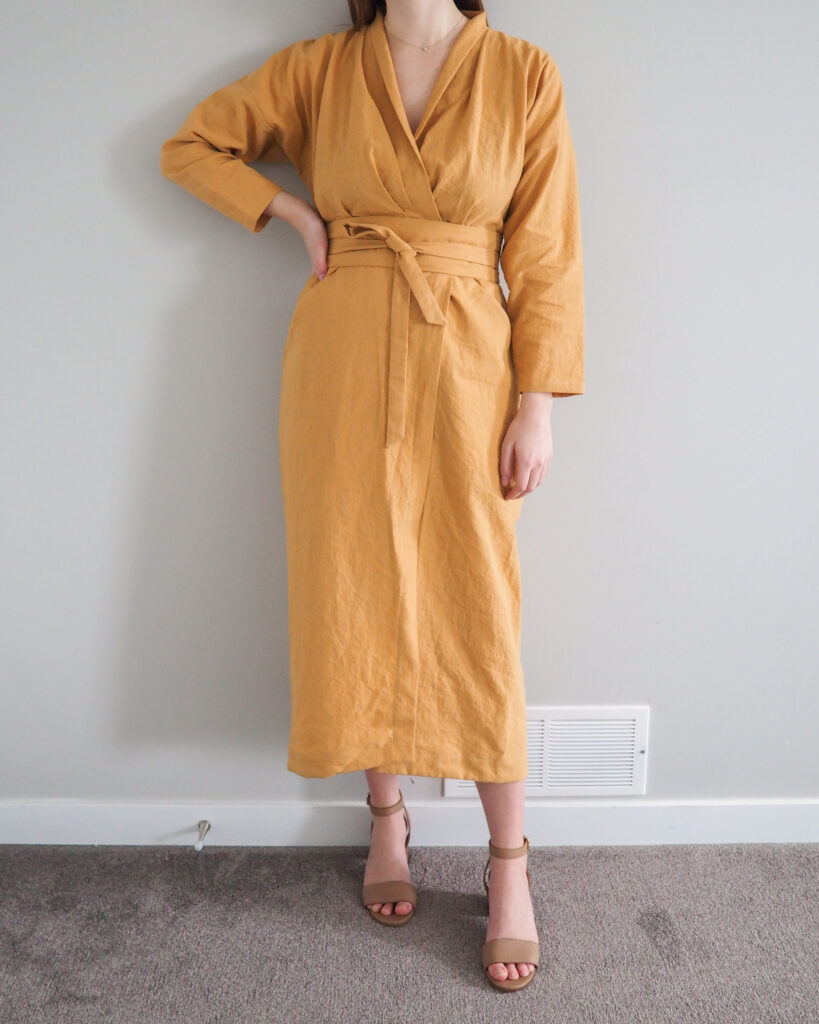
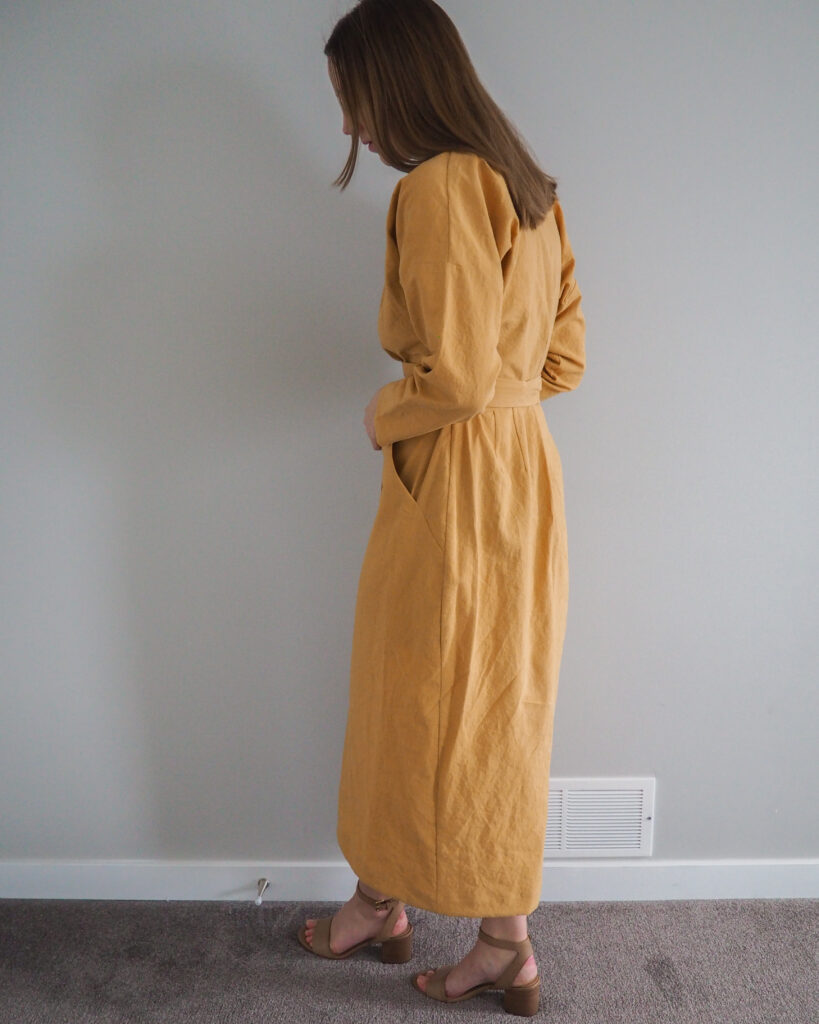
Pattern: Wildwood Wrap Dress by Sew House Seven
Size range: US size 00 (B31″, W23.5″, H34″) to 34 (B61.5″, W57.25″, H65″)
Fabric: Bio Washed Cotton Linen Blend in 8 – Golden Beige from Two O Nine Fabric
View: Made the View A sleeve with the View B hem length
Difficulty: Intermediate
Approximate time to make: 4-5 days
Sizing
My measurements (B37″, W30″, H40″) put me at a size 10, however I sized down to the size 8 because I had previously made SH7’s Burnside Bibs in an 8 and they worked well for me. I didn’t want too much fabric in the bust area which is sometimes an issue for me with patterns, and since it’s a wrap dress and has a variable waist size, I felt comfortable sizing down to the 8.
In the end, I feel like sizing down was the right choice. The bodice feels voluminous with the pleats without being too full, and the waist and hips fit me with a comfortable amount of room.
Adjustments
- Added a long sleeve which I drafted based on the Paper Theory LB Pullover pattern. I attached the sleeve once the shoulder seam was finished, and then carried on with the instructions as written, sewing the sleeve and side seams all together in one go from the sleeve hem and down the bodice.
- Sewed the side seams of the bodice, skirt, and skirt facings at 3/8″ instead of 5/8″ (so I gained an extra 1/2″ on the total garment circumference)
Overall Thoughts
Overall, I really enjoyed this pattern. It was complex without being too difficult, which kept things interesting. I think all of the small details and finishes make it look really professional. One of the things that I really appreciated about the pattern (and Sew House Seven patterns in general) was that all of the pieces came together so well, and all of the notches were exactly where they were supposed to be. Sometimes I find with patterns that markings can be a little off once you get going, and that wasn’t the case here which made it so much more enjoyable and satisfying to sew.
I had trouble with the neckline at the shoulder pivot points, and ended up with some puckering there. I could have been doing something wrong, but no matter what I tried, I couldn’t get the fabric to lie flat. I think it’s because the shoulder and neck seam uses a french seam. The first seam is sewn at 1/4″, and you clip into the corners. The second seam is then sewn at 3/8″, enclosing the first seam, and for this seam you’re unable to clip into the corners. So it’s really difficult to get the fabric to cooperate without that clipping. In the future I would likely skip the french seam altogether.
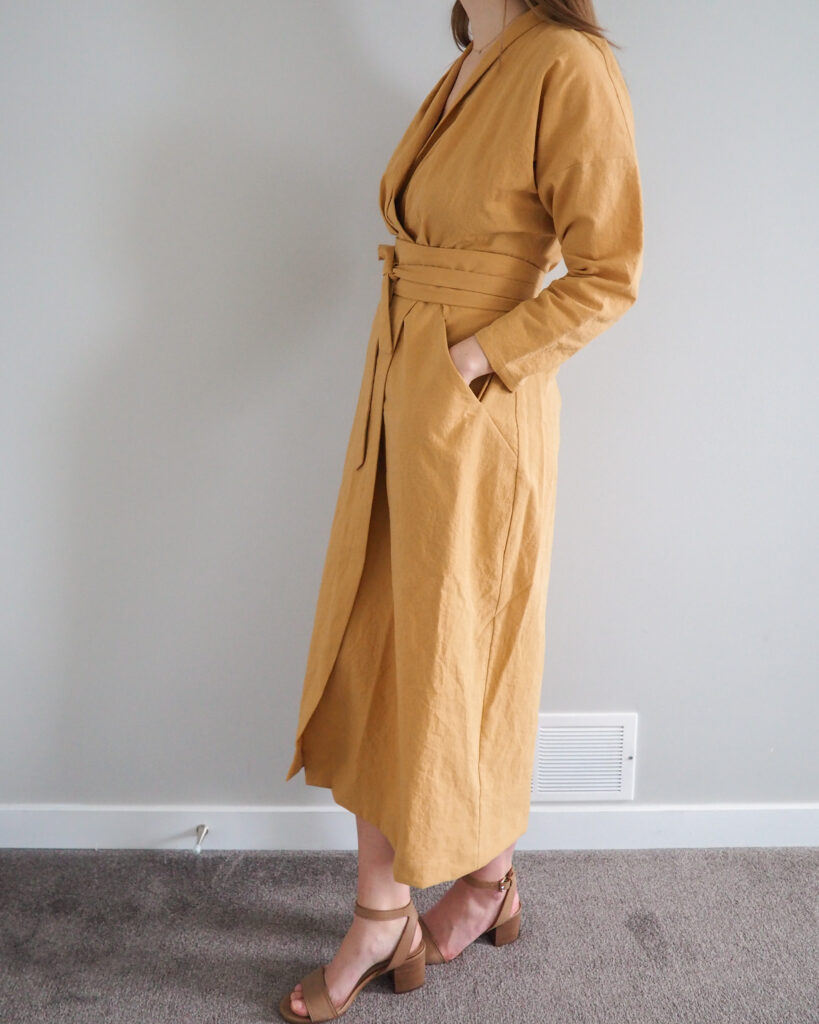
In terms of fabric, I think the cotton linen blend was a good choice. The cotton adds some structure to the bodice and pleats, and has a really nice, crisp finish. I’d really love to see this dress made in something with more of a fluid drape though, like a silk or satin – I think that would make for a beautiful dress!
Style-wise, I chose to pair this dress with some block heel sandals because they just felt most appropriate. This dress feels like a dose of spring and summer, especially with the yellow colour, and I’m definitely here for it because it feels like winter is dragging out! But for the colder months I do think this could be worn layered over a turtleneck and leggings to warm it up.
I’d love to hear your thoughts on this make and what you’re planning to sew for spring and summer in the comments below! As always, thanks for reading.

Pressing fabric before cutting is essential. Pressing seams/allowances is also essential – this would have completely eliminated your difficulty with the French seam where the shoulder and front meet. Hand basting before final stitching would also drastically improve the result…
Basic ironing skills and learning how to ‘ease’ fabric and seams will take you light years into becoming a more accomplished maker.
Lengthening the sleeve by using view ‘B’ – using the ease incorporated in the original design – probably would have eliminated the ‘gap’ below the back shoulder…..
Your presentation is lovely!
Oops! Also would like to mention:
‘Adding’ 1/4″ to the side seams extends the overall width by 1″ – not 1/2″.
1/4″, front AND back = 1/2″ x two sides = 1″
I agree about the sleeve/neck seam. I have unpicked 3 times with several partial unpicks and finally gave up and went for a simple seam and zig zag (and yes I t
ried basting)… it was the only way I could get a good finish. And even if I’d been able to navigate the ‘pivoting’ I really didn’t like the bulk/stiffness of the French seam. I’m happy with the end result on this seam.