I designed the Marzipan Maker’s Coat to be a simple and easy, unlined chore coat for mid-weight wovens that works well worn on its own or as a layering piece. That said, having now made several versions myself I’ve found it to be a really versatile pattern that can even be made into a shirt or shirt dress in lighter fabrics, or a more outerwear-style coat in heavier fabrics.
I recently made a cropped wool version and added a lining with the idea of making a tutorial. Unfortunately, once I was done I managed to accidentally delete all of the photos I took of the process! But I really liked the finished result and thought you might too, so here we are with a second attempt.
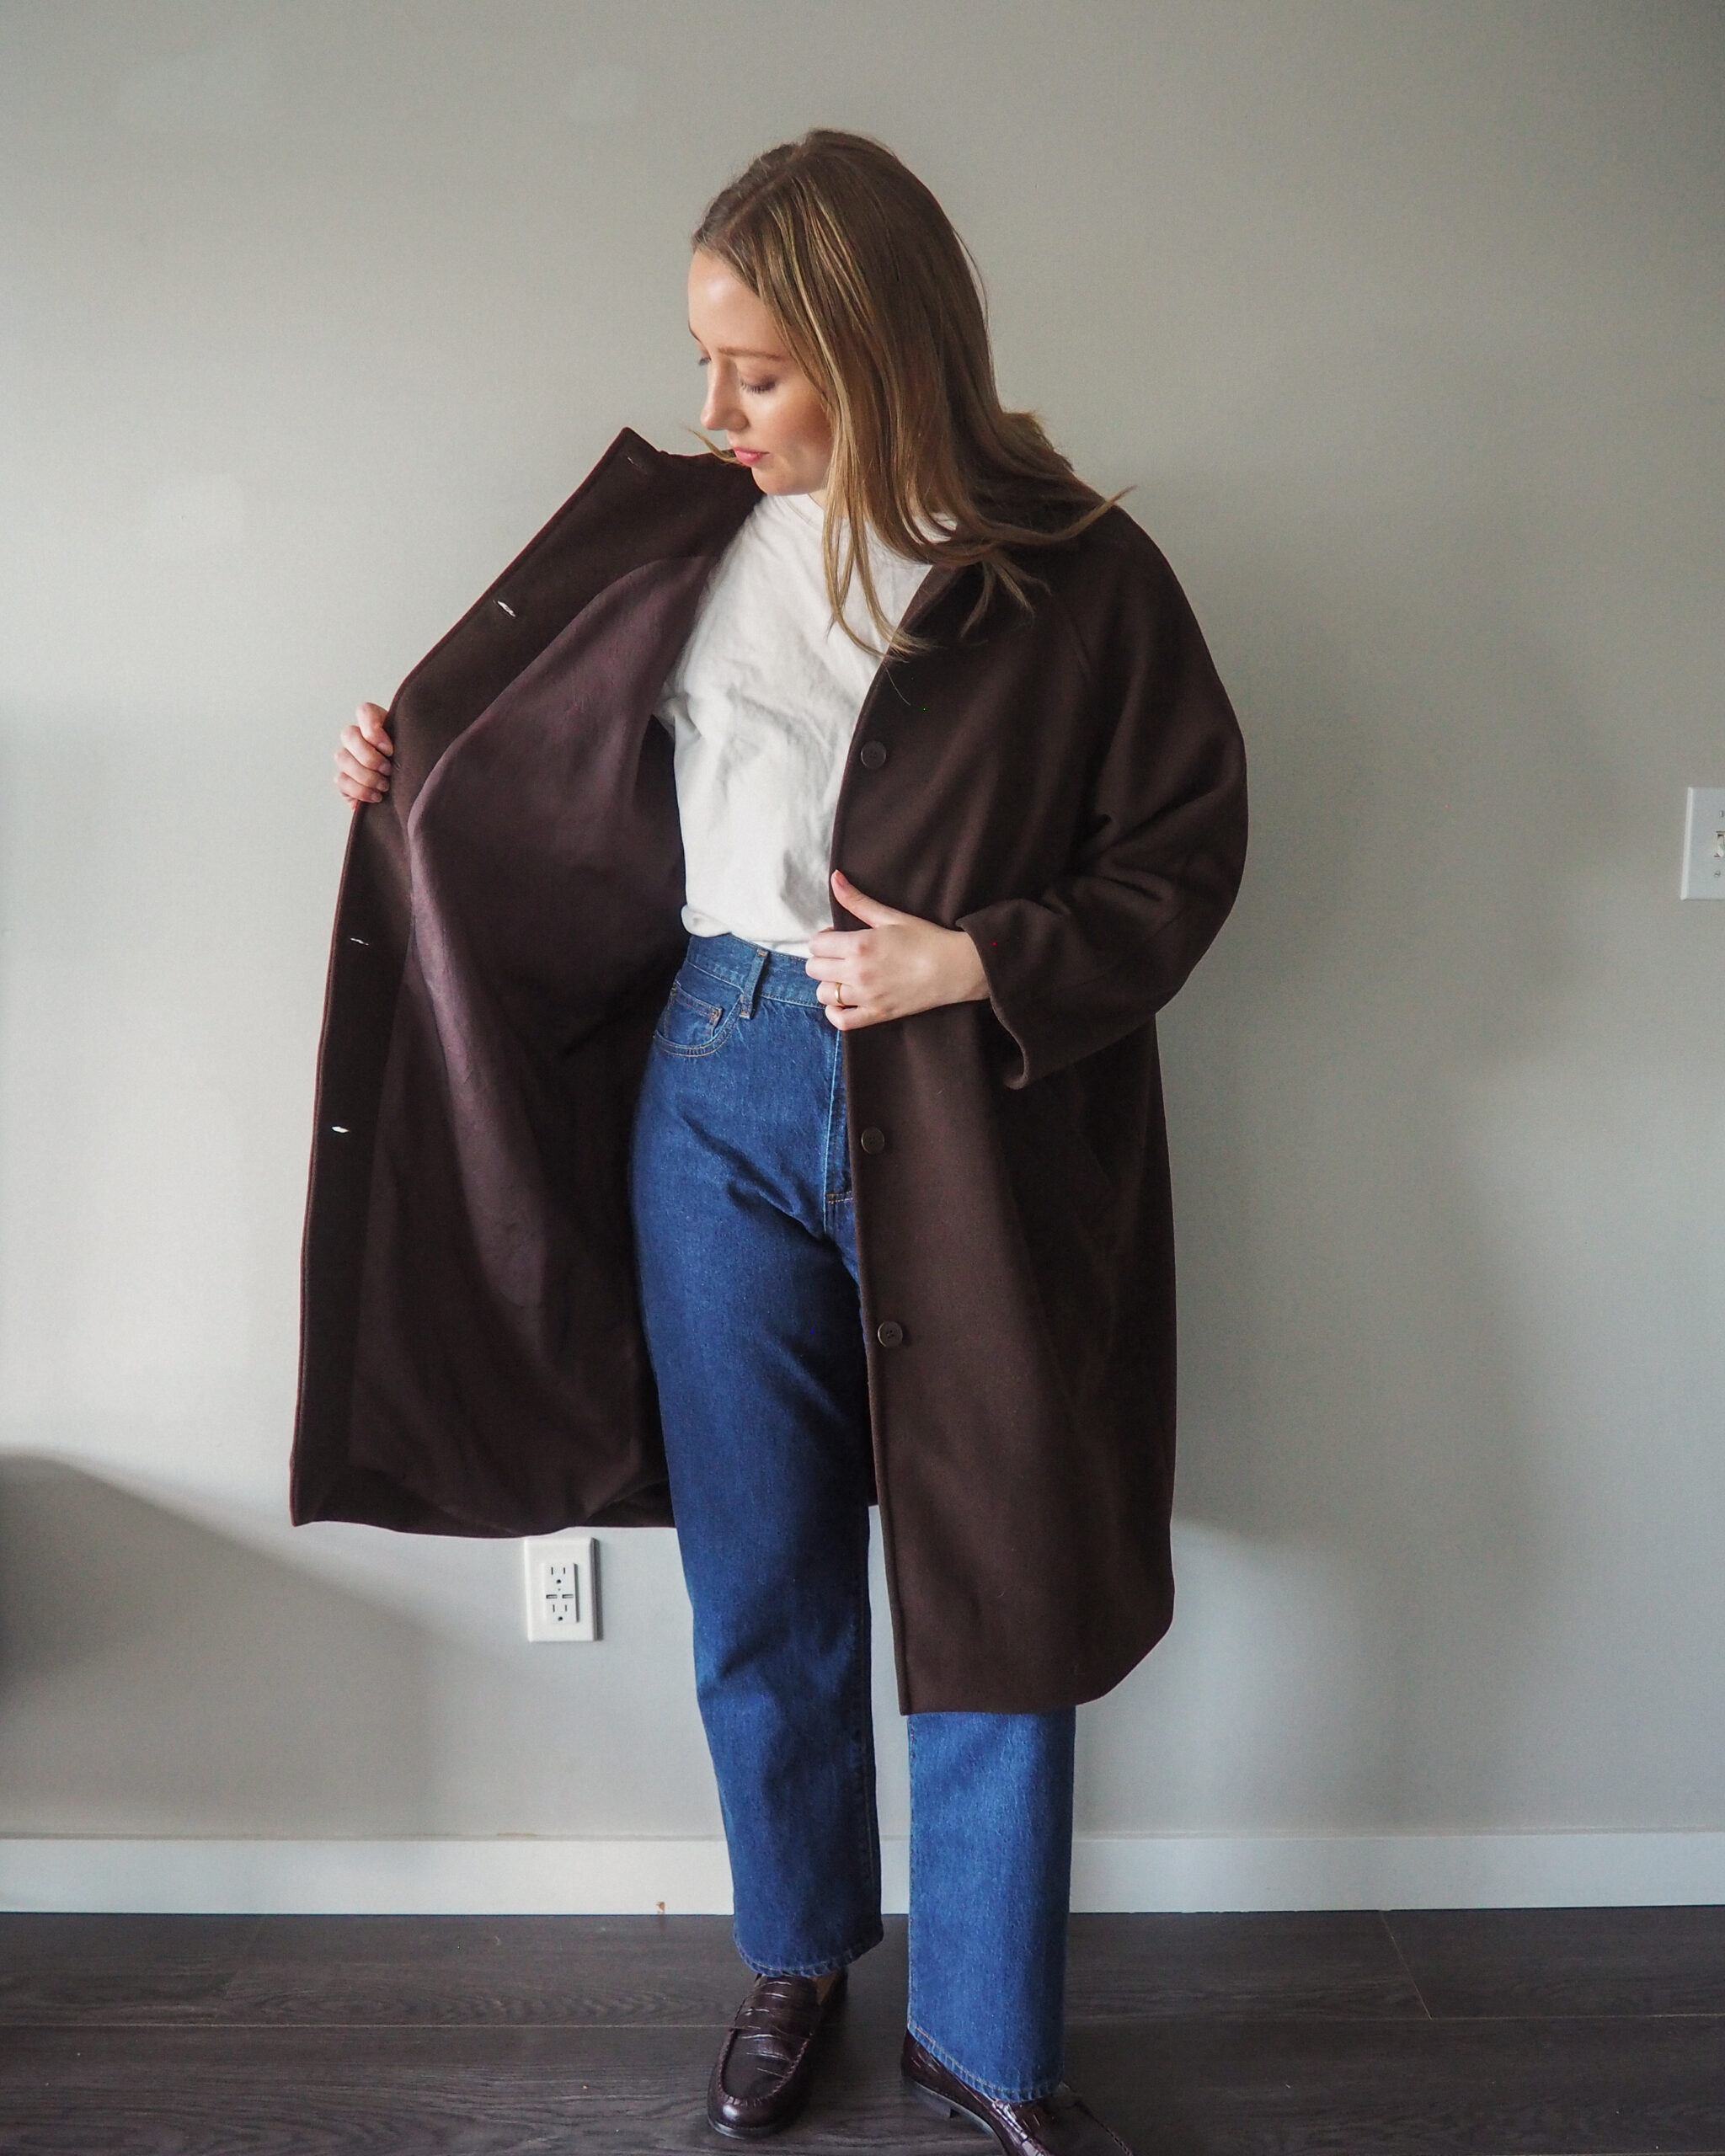
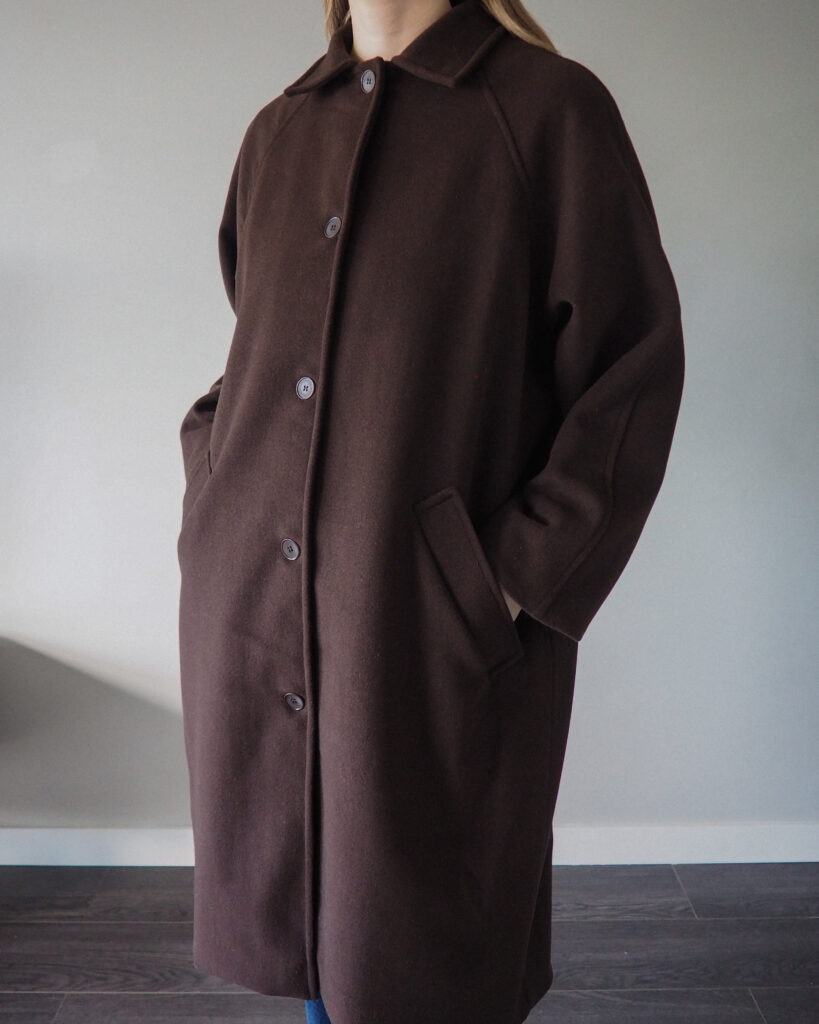
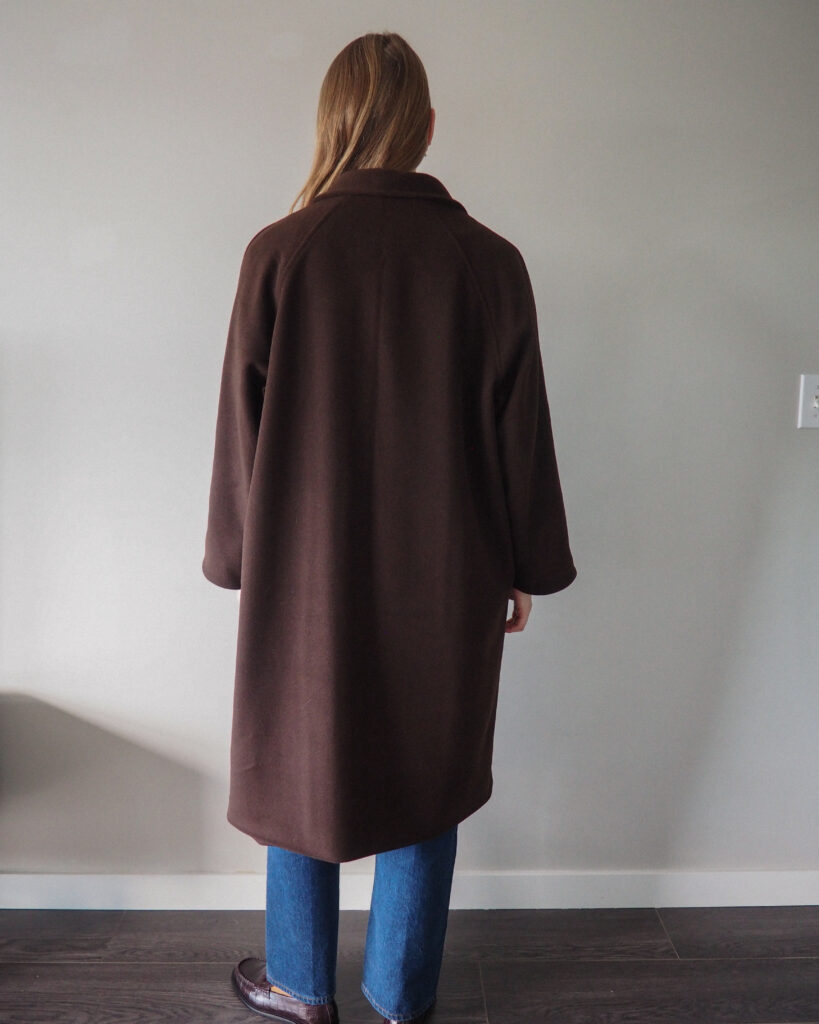
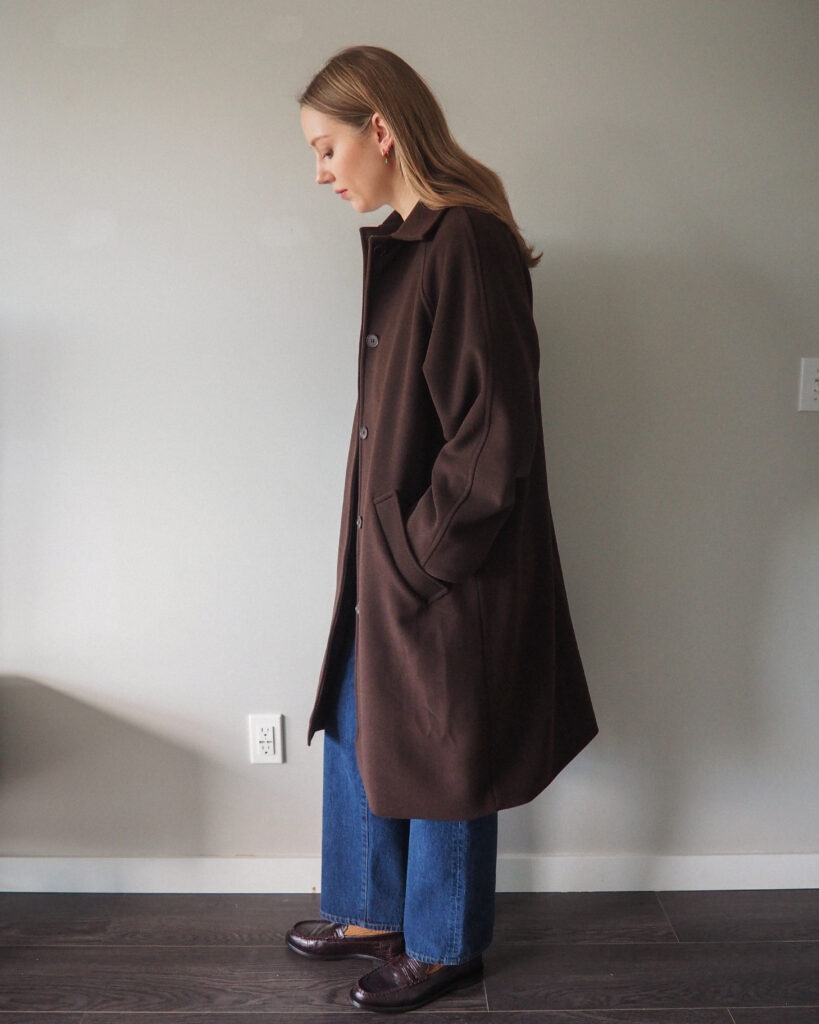
This time around, I made the longer View C with a handful of adjustments to create a classic wool coat based on an image I’d saved of a Toteme coat. I made a size 10 which is my usual size in a wool blend outer fabric with a bemberg cupro lining. Here’s how it turned out!
Here’s a quick summary of all the adjustments I made to this version:
- Added a lining
- Added 6cm wide cuff facing to sleeve instead of foldover hem
- Added 10cm to length
- Widened bottom hem to 5cm
- Widened the collar by 1cm
- Added self-drafted slanted 4.5cm wide welt pockets instead of patch pockets
- 5 buttons spaced 16cm apart
In this tutorial, I’ll be walking you through the first two adjustments on this list. The rest are optional and simpler to do, but I can provide more detail on those in a future post if you’re interested. Then, I’ll go over the sewing process for installing the lining. There’s also a video of the construction process if you’d rather watch that instead.
I would recommend this hack for intermediate to advanced sewists who are comfortable with some pattern manipulation, and/or those who have bagged out a lining before. If you haven’t, there are a lot of great lined coat patterns out there that have full instructions which will likely be a better first experience than this hack. Although if there’s enough interest, I could also release a lining expansion for the Marzipan pattern in the future. All of that out of the way, let’s jump into it!
Adjusting the Pattern
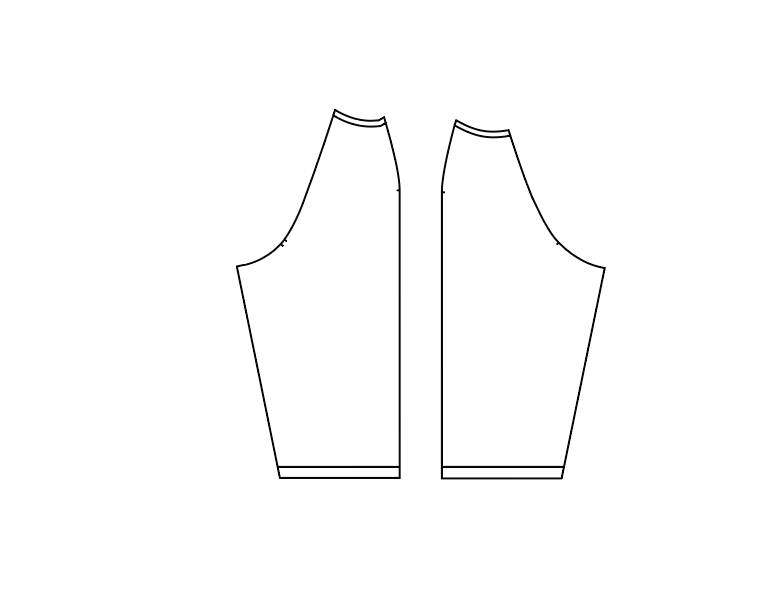
To get started, you’ll want to gather your pattern pieces in the size and view you want to make. You’ll be working with the front, back, sleeves, and facings. I find this easiest to do digitally using the PDF pattern files. I use Adobe Illustrator, but you can use any sort of vector-based program you have access to (a good free alternative is Inkscape). Or if you prefer, you can work with a printed version of the pattern and make your adjustments with good old pencil and paper.
Sleeve with Cuff Facing
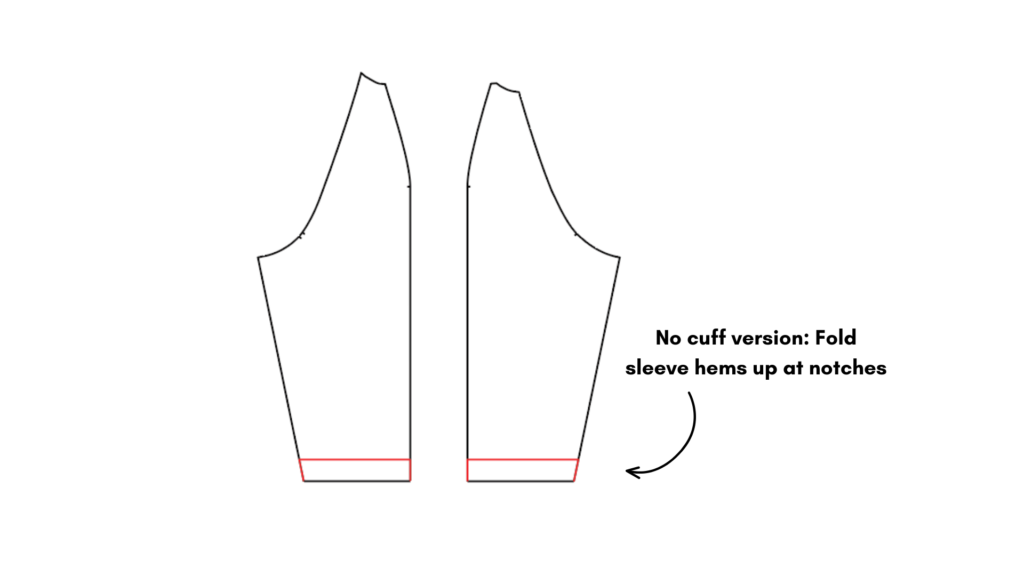
For my version, I changed the sleeve to have a cuff facing instead of a foldover hem. This is optional and you can still draft a lining with the original sleeve, but I’ll show you how to do the cuff facing in case you’d like to make the same change.
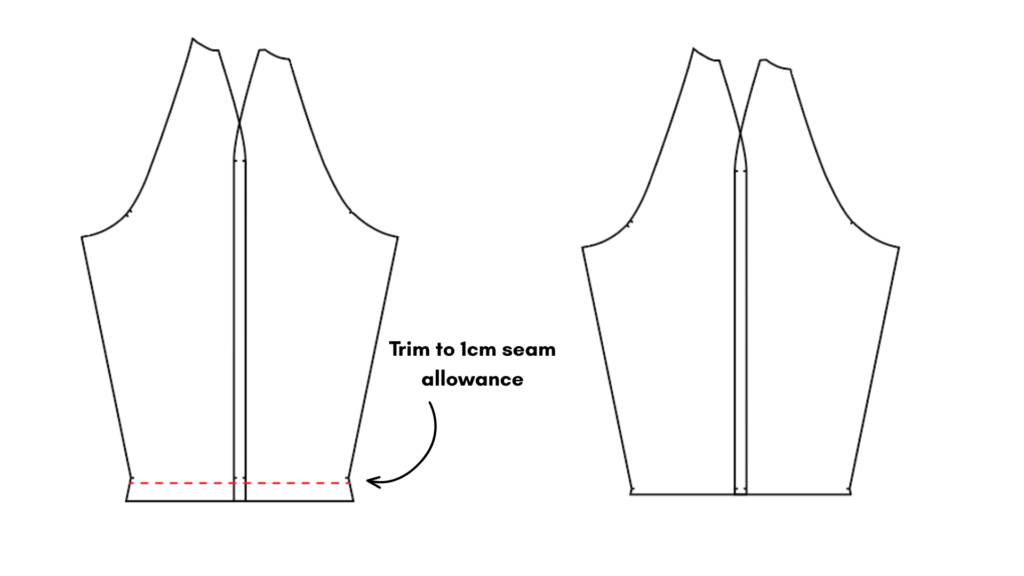
First, take your front and back sleeve and overlap along the shoulder/centre seam by the seam allowance. This pattern has a 1cm seam allowance for most seams including this one, so that means you’ll want to overlap the pieces by 2cm total (the seam runs down the middle with 1cm seam allowance on each side).
Next, trim away the hem allowance so that there is just a 1cm seam allowance at the bottom of the sleeves.
Now you can trace out your cuff facing. I made mine 6cm wide, with 1cm seam allowance on the top and bottom edges (for a total width of 8cm from top to bottom). Note that since the sleeves already have seam allowances included, you don’t need to add anything to the side seams.
Your final sleeve and cuff pieces will look like this, and will all be cut from your main fabric (cut 2 mirrored of each):
This adjustment can also work for the original unlined pattern if for example you want to have a contrasting fabric for the inner sleeve cuffs. I did this for a version where I used a canvas for the main body, but cut the collar and cuff facings from corduroy, which resulted in this barn coat-inspired jacket.
Note that if you choose not to do a cuff facing and use the original sleeve, before moving on to the next step you will want to fold the hem allowance of the sleeve up at the notches to prepare the sleeve pattern pieces for drafting the lining:
Drafting the Lining
Now that our sleeves are done, we can move on to creating the lining pieces. This tutorial by Tilly & the Buttons was a really great resource if you’d like to check it out. Their instructions are for a pattern with a set-in sleeve, but it mostly works the same for the Marzipan with a few adjustments.
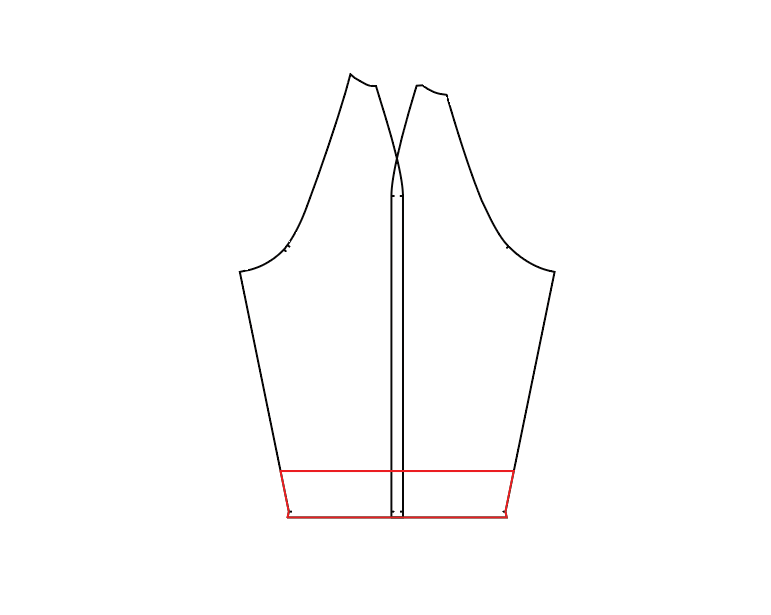
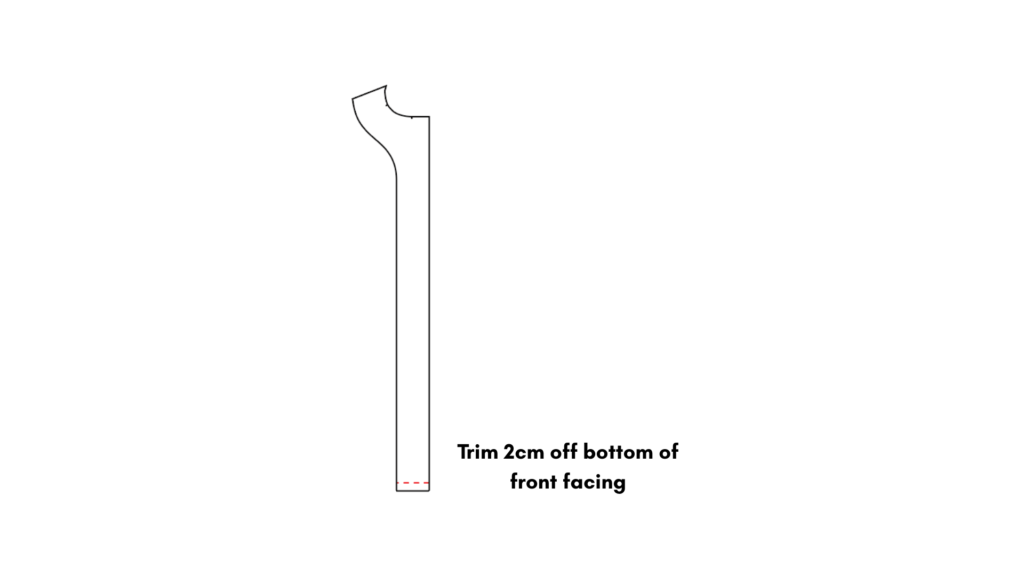
First, take the front facing and front facing interfacing pieces and shorten by 2cm from the bottom, which will make sewing the lining to the facing and hem much easier later on. This is the only adjustment you’ll need to make to the original pattern (aside from the cuff facings we just went over if you opted for those).
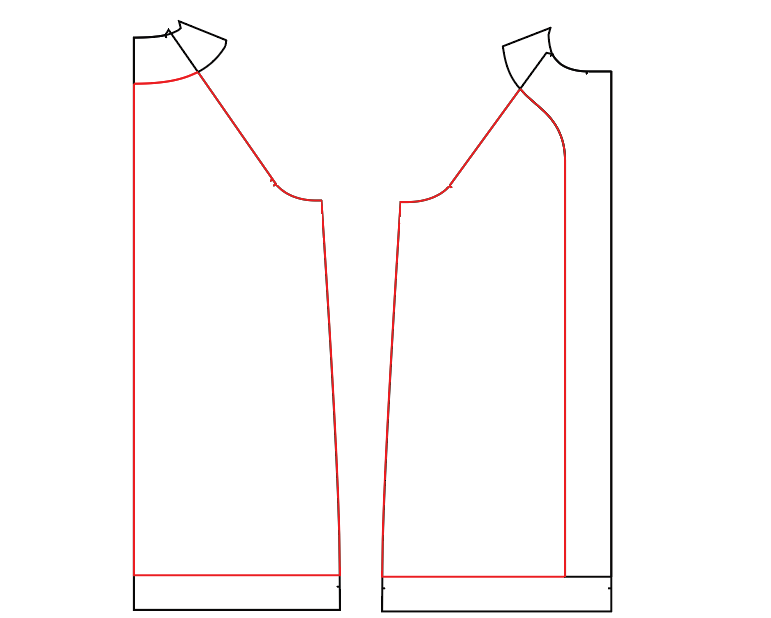
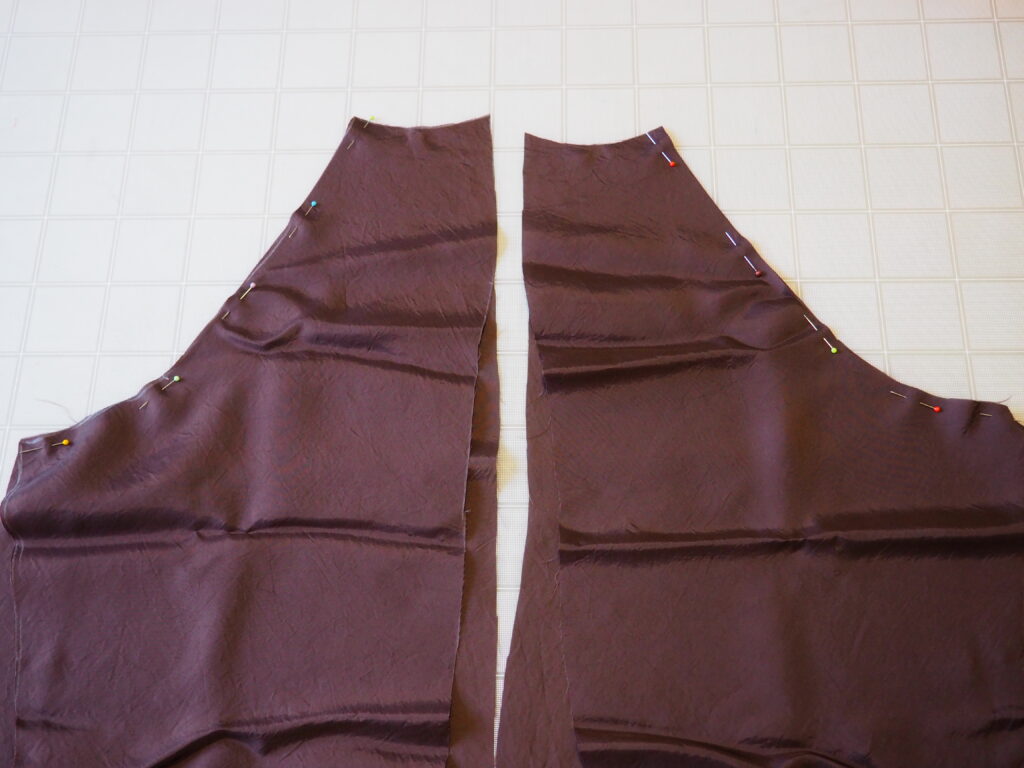
Next, lay the newly shortened front facing on top of your front piece, lining it up at the front neckline corner. The bottom of the facing should now end 2cm from the notch on the front piece. Trace off the front piece along where it meets the facing, squaring over from the bottom of the facing (red lines). This will become your front lining piece.
Do the same for the back. Lay the back facing on top of the back piece along the neckline and trace it off, lining up the bottom of your back lining with the bottom of the front lining.
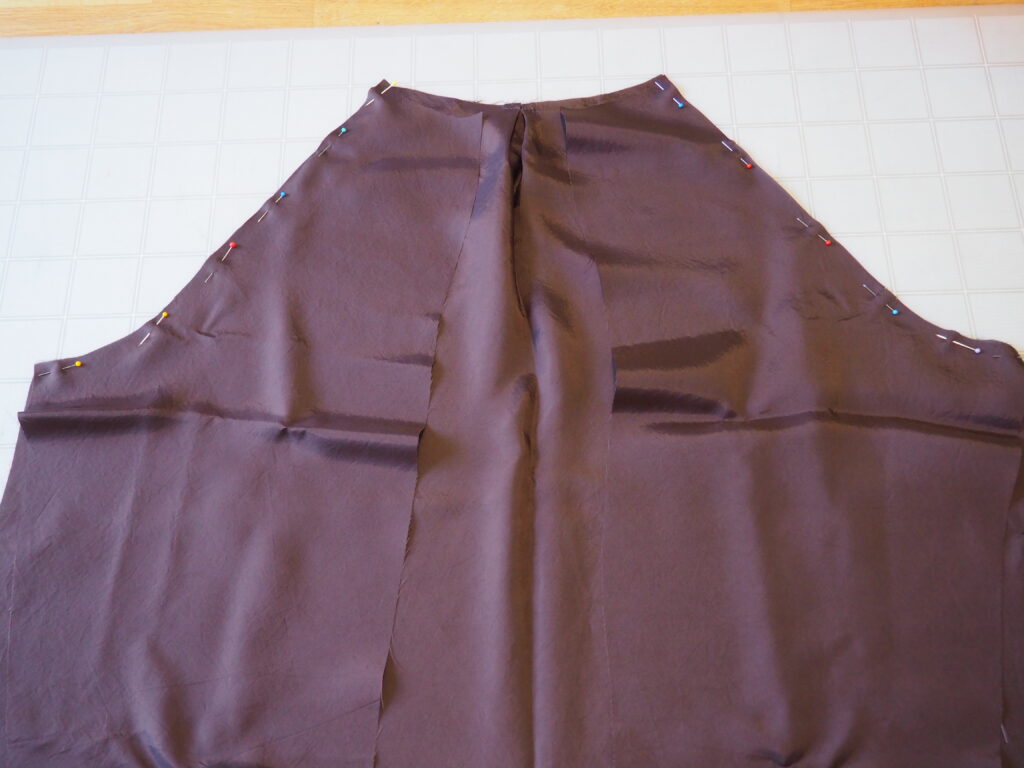
From here you will need to add a 1cm seam allowance along the edges where the lining meets the front facing on both pieces, like so:
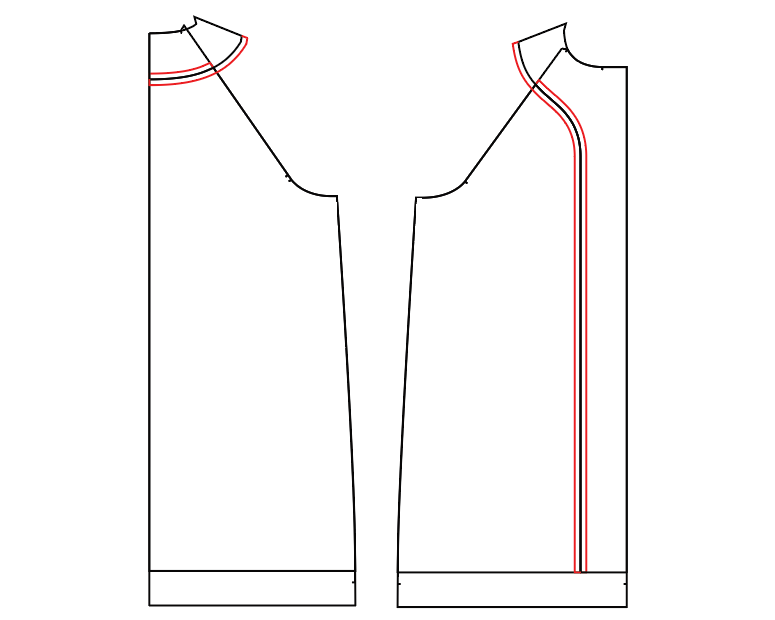
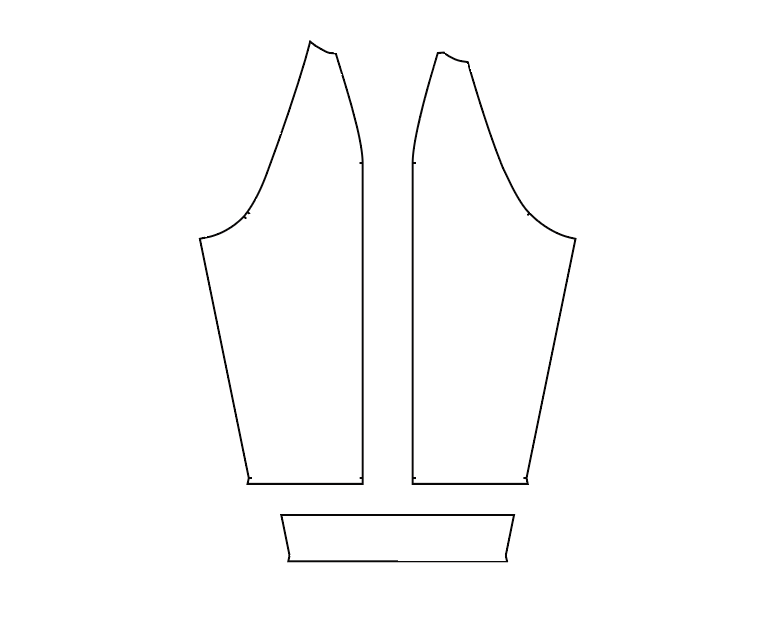
All other seam allowances are already accounted for in the original pattern, so you don’t need to add them anywhere else. Here is what the front and back lining and facing pieces now look like:
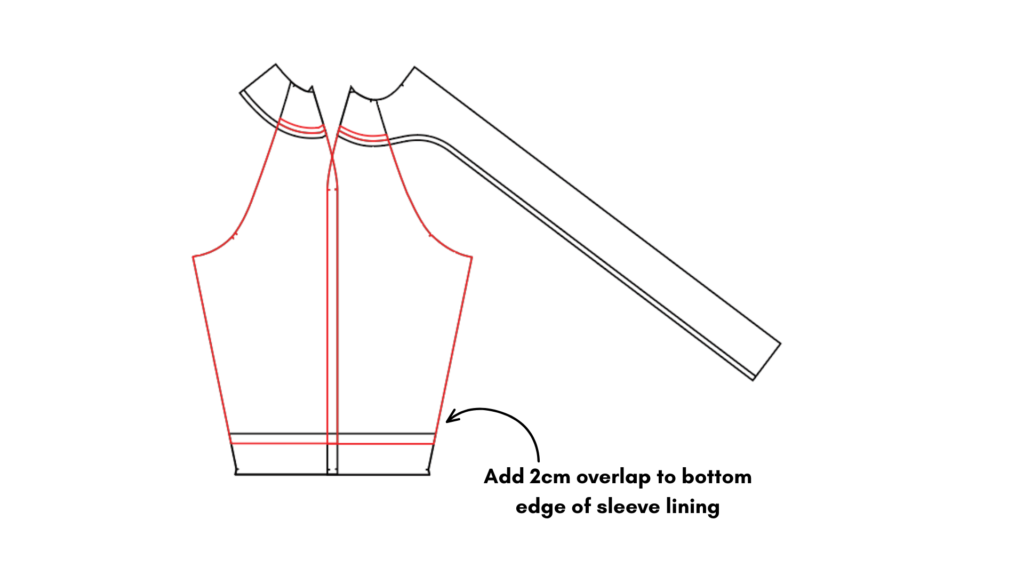
Finally, we can do the same for the sleeves. Lay the front and back facings on top of the front and back sleeves, respectively, aligning the pieces along the shoulder edge. Here is where you will also want to lay your sleeve cuff pattern piece over the bottoms of the sleeves as well, or (if not using the cuff facing modification) fold back the sleeves at the notches so that the hem is turned up. Then you can trace off the front and back sleeve linings, adding 1cm seam allowances to the neckline edges.
Note that because the sleeve cuff (or hem) already has a 1cm seam allowance included, you’ll actually want to add 2cm to the bottom part of the sleeve lining where it overlaps: 1cm to meet the seam of the sleeve cuff where it is sewn, and 1cm seam allowance on top of that.
Now we have all of the main pieces we’ll use for the lining. But before we go ahead and cut them out, you’ll want to add some ease into them to make sure they can move and shift comfortably inside the coat when it’s worn.
Adding Ease to the Lining
This is an important step, so don’t skip it! Note that the following adjustments are for the lining pieces only; you can leave the main pattern pieces as they are.
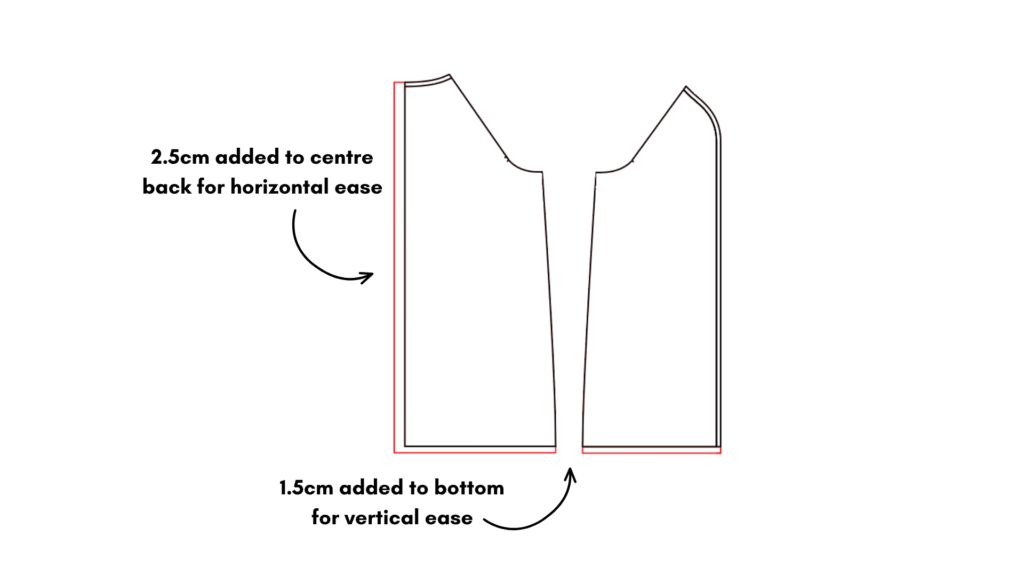
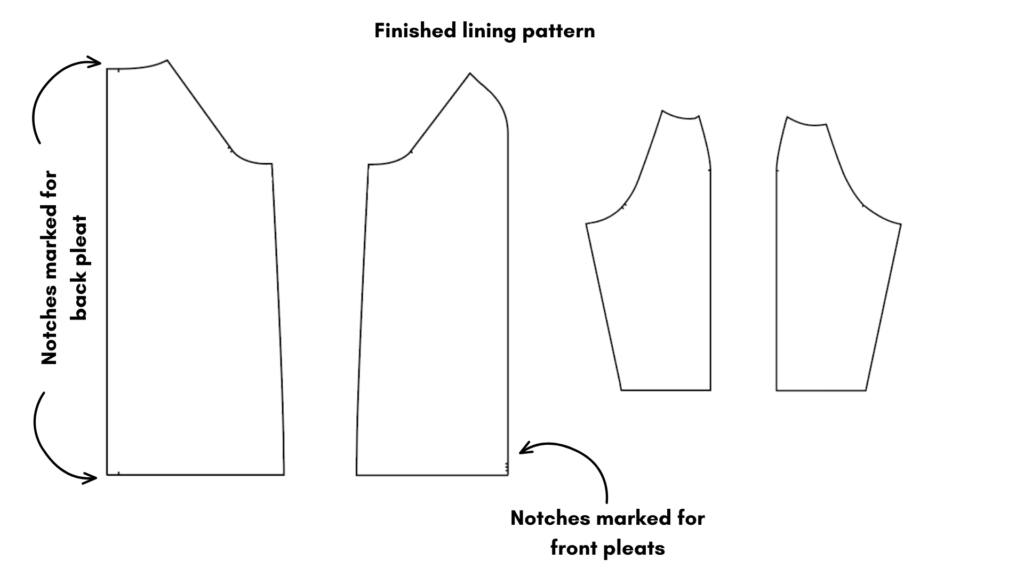
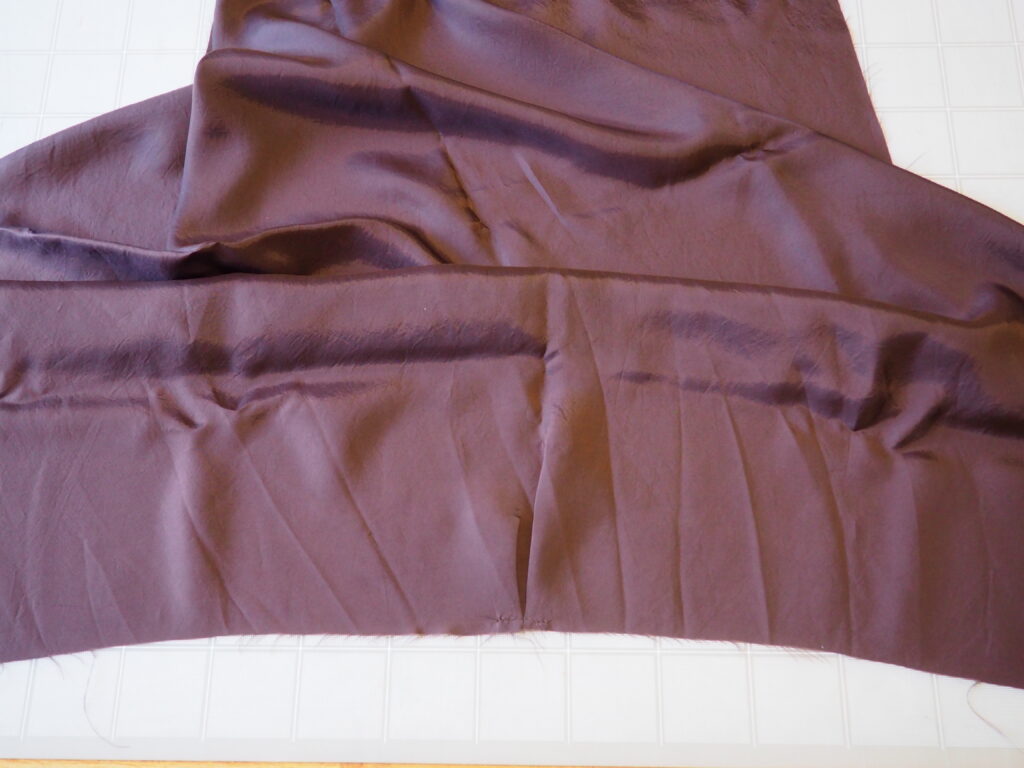
First, I added a pleat to the centre back lining by adding 2.5cm to the centre back. During construction, we’ll make this into an inverted box pleat down the centre back which will give us horizontal ease in the body. Mark notches at the top and bottom, and don’t forget to clip into the fold or otherwise mark the centre as well when cutting out your lining.
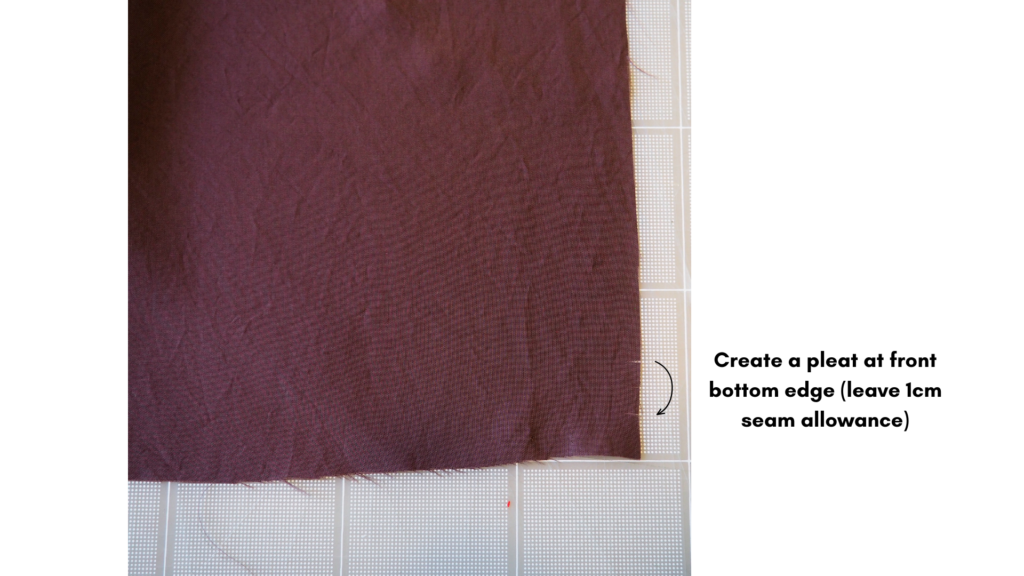
For both the front and back lining, I also added 1.5cm to the bottom to give us some vertical ease. We will create a pleat at the bottom front corner so that it will line up properly with the facing. We want to place this pleat 1cm from the bottom to account for the seam allowance. When marking the notches for the pleat, make the first notch 1cm from the bottom, the second notch 1.5cm from the first, and then one in the centre (0.75cm from the notches on either side).
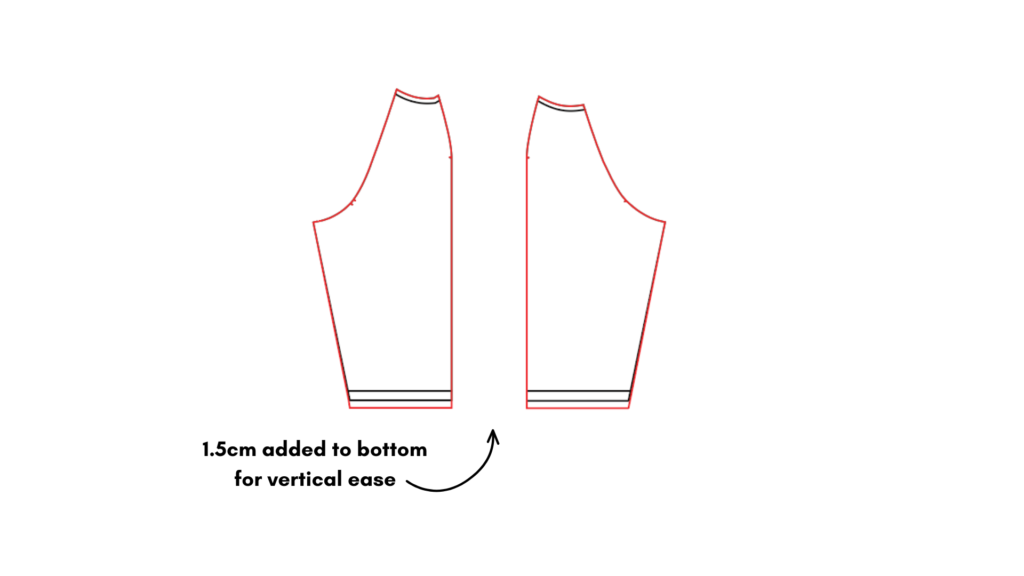
For the sleeve lining, I added 1.5cm to the bottom, again for vertical ease. We don’t need to make this one into a pleat, so no need to add any notches. Just make sure that the length of the seam at the bottom of the sleeve stays the same and doesn’t get any longer or shorter – just move the lines straight down, otherwise it won’t match exactly with the sleeve cuff facing we drafted earlier (or sleeve hem if you skipped that part).
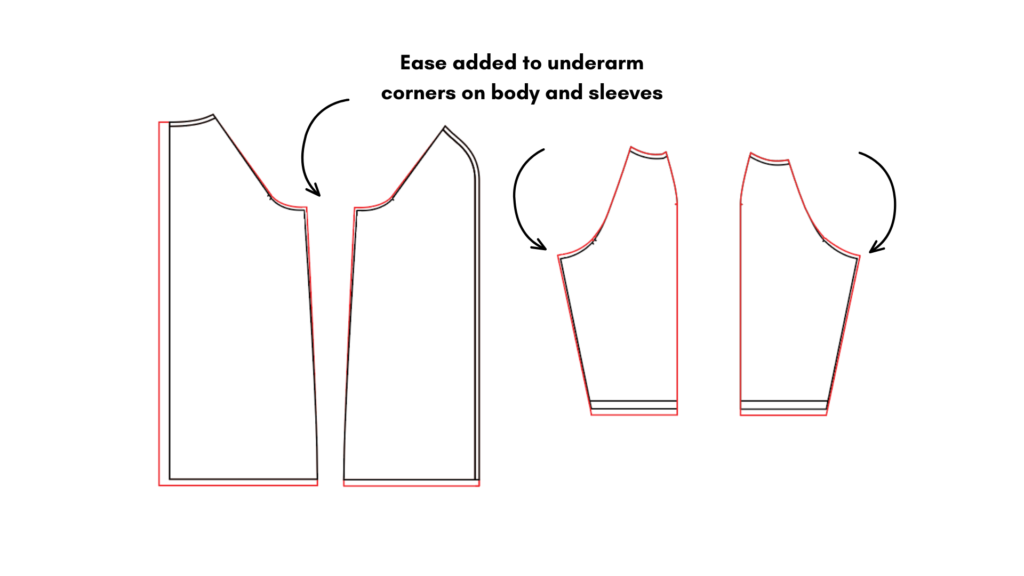
Finally, you’ll want to add a bit extra to the lining pattern at the underarm corners of the body and sleeves. For this part, I moved the corners over and up by about .7cm on all pieces: front, back, and both sleeves. This will allow the lining to comfortably move around the bulky seams of the main outer pieces.
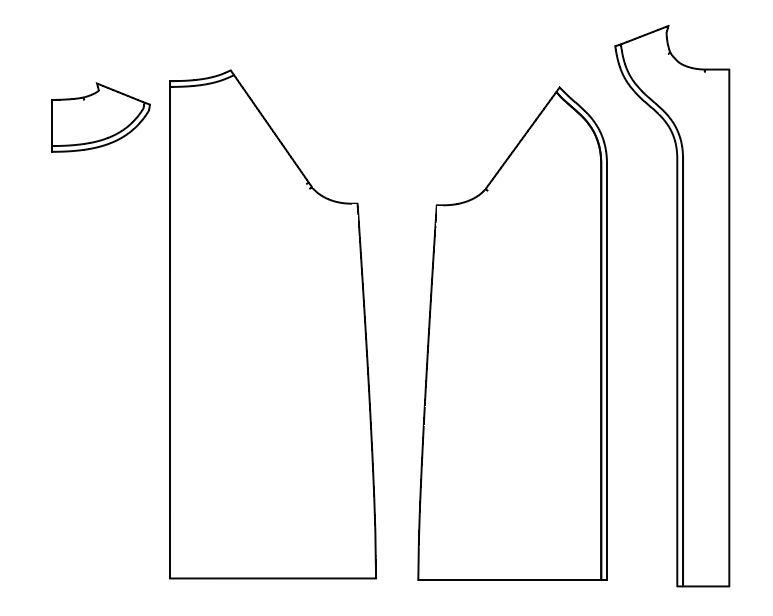
Here is what the finished lining pattern looks like:
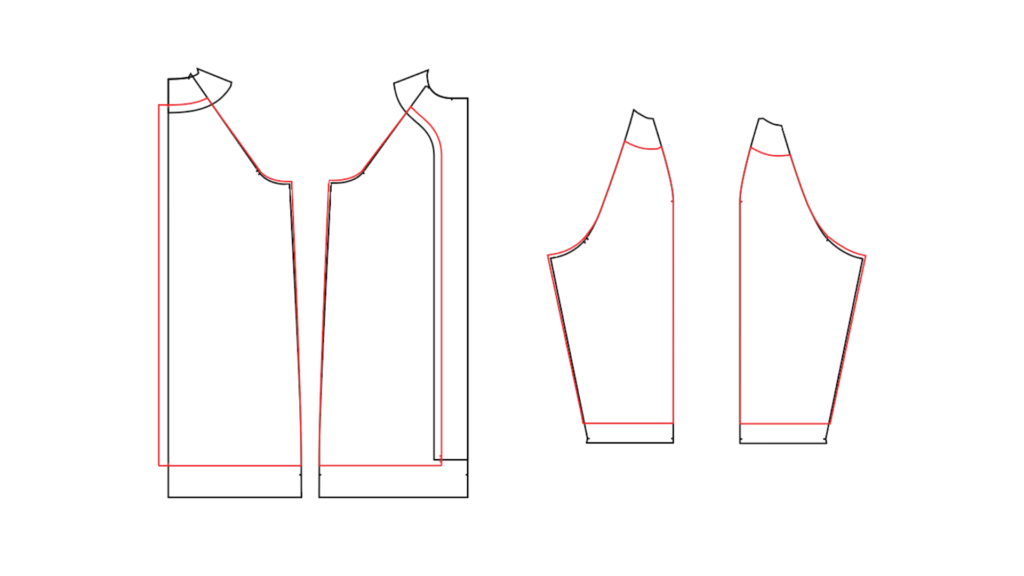
And here is the finished lining (in red) compared to the main pattern pieces:
The main front and back, sleeves, sleeve cuffs (optional), collar, and front and back facings will all be cut from your main fabric as per the original pattern. Remember, the front facing was shortened by 2cm; this and the sleeve cuffs (if you opted for them) are the only alterations to the main pattern pieces. You will also cut out the normal interfacing pieces as in the original pattern.
For the lining, you’ll want to cut 1 back, 2 fronts, 2 front sleeves, and 2 back sleeves from your lining fabric. Remember to mark your notches!
Sewing Instructions
Here is a link to the video of the construction process if you’d prefer to watch instead of read. The lining section starts around the 14-minute mark.
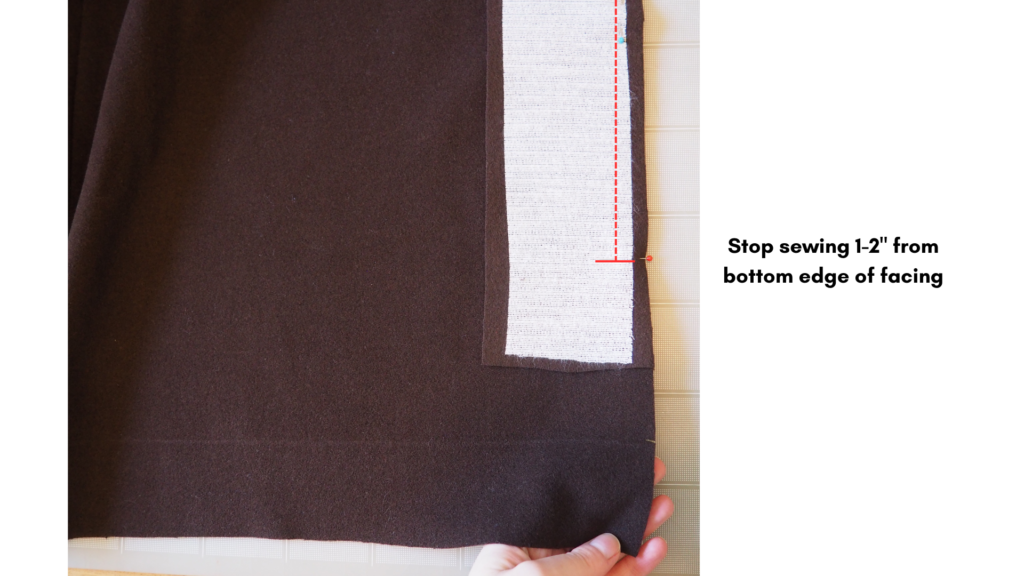
Start by assembling the main body of the coat as per the original instructions, starting with the raglan seams on the front and back and then moving to the shoulder and side seams. The only difference is that when you attach the facings to the main body of the coat, you’ll want to start and stop your stitching a few inches from the bottom of the facing, which will make it easier to attach the lining at a later step.
Once the facings are sewn to the main body, you can stop there and switch over to assembling the lining.
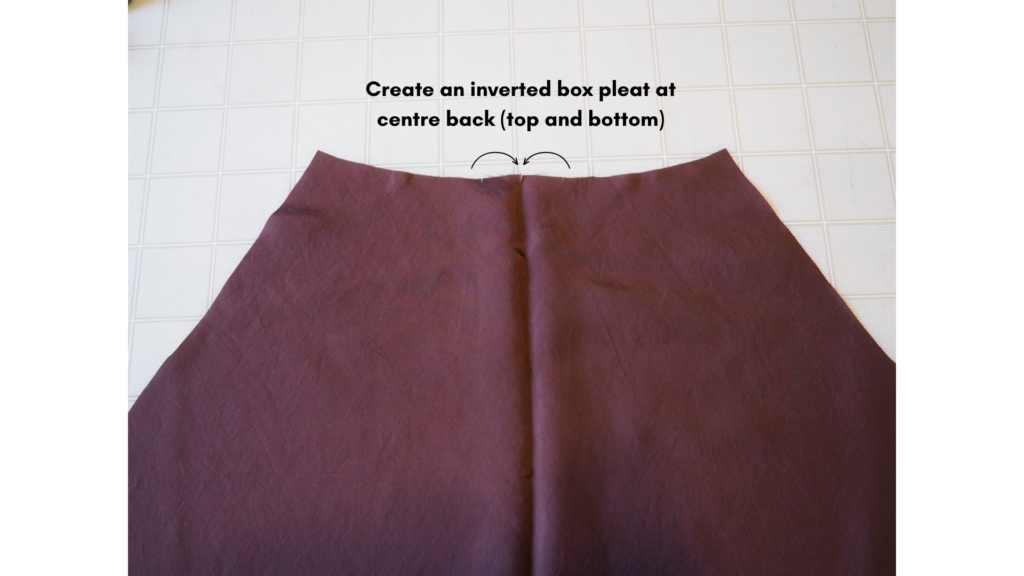
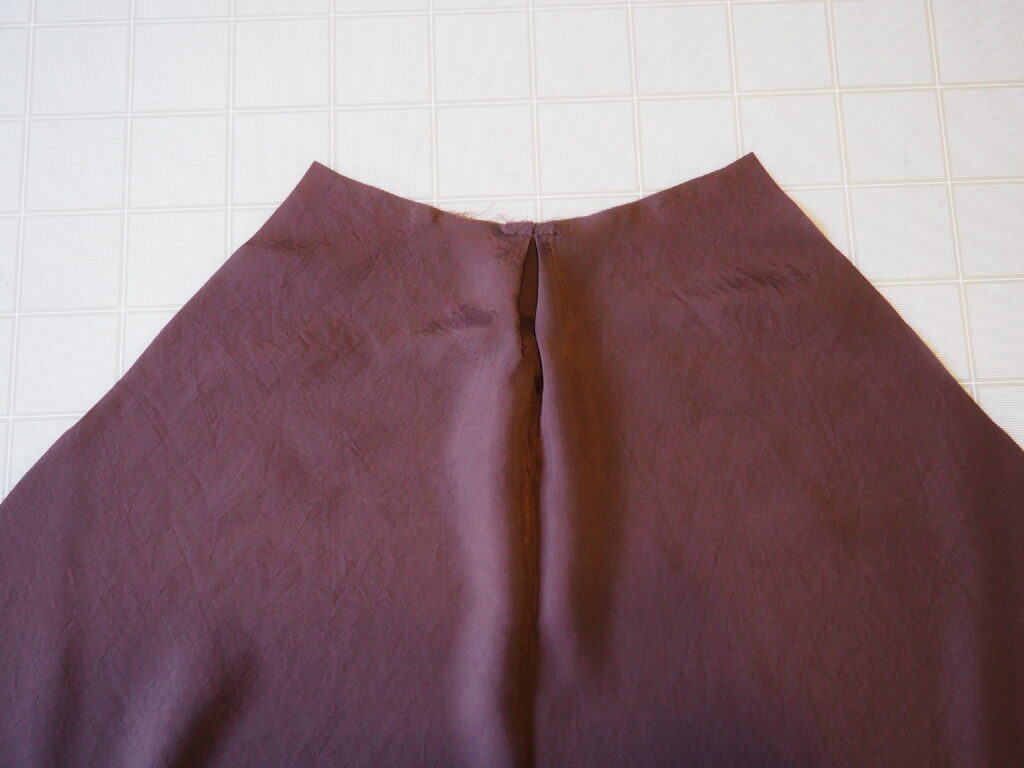
Start by sewing the pleats at the centre back at both the top and bottom. You will match the notches to the centre back, creating an inverted box pleat from the right side.
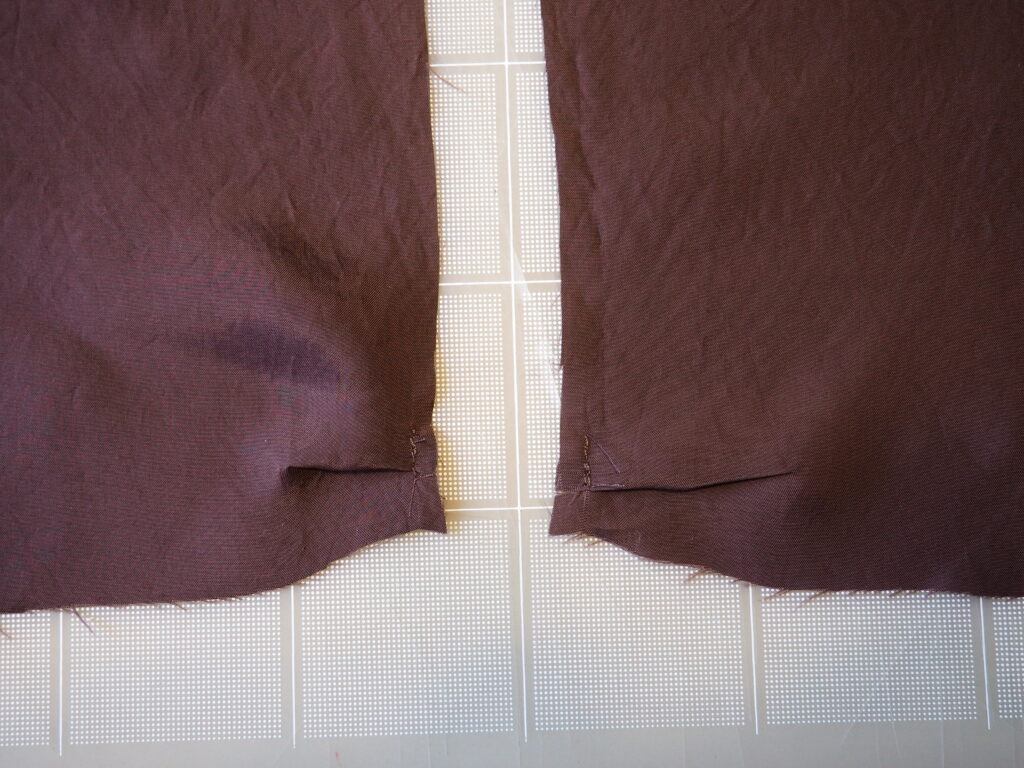
Next, fold the pleats on the front, folding the top notch down to meet the bottom notch, leaving 1cm seam allowance free along the bottom edge.
Now you can sew the lining together as per the outer jacket: front sleeves to front bodice, back sleeves to back bodice, and back shoulder seams. Press all of these seams open.
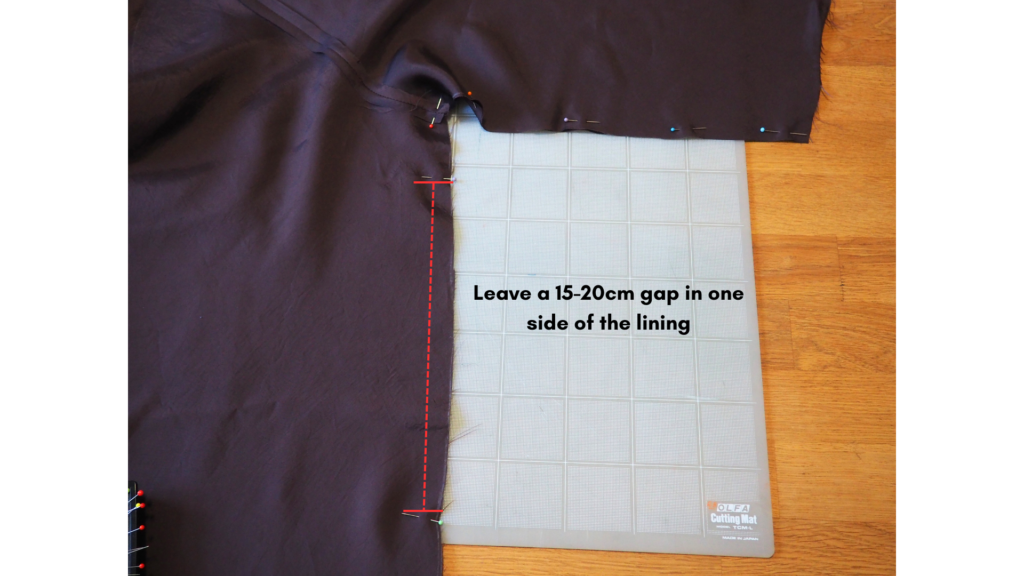
When sewing the underarm/side seam of the lining, leave a 15-20cm gap in one side which will later be used to bag out the lining. It helps to backstitch well at each end and also press the seam allowances here so that it’s easier to sew closed later on.
Turn both the main and lining wrong side out. Pin and sew the lining to the jacket facings with right sides together. It’s best to start pinning from the centre back and then down each side. The bottom of the lining should line up with the bottom of the front facings. The lining will need to be eased along the curves of the facing; pin it well and stitch slowly to avoid puckering. Then, clip into the seam along the curves and press the seam allowance towards the lining.
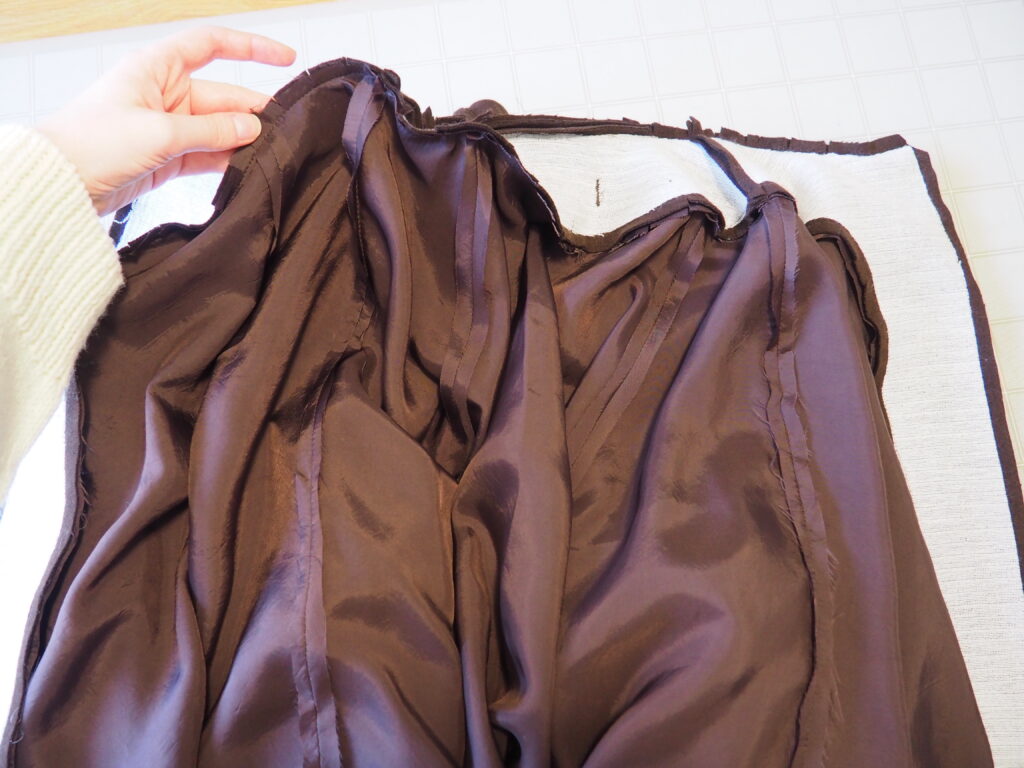
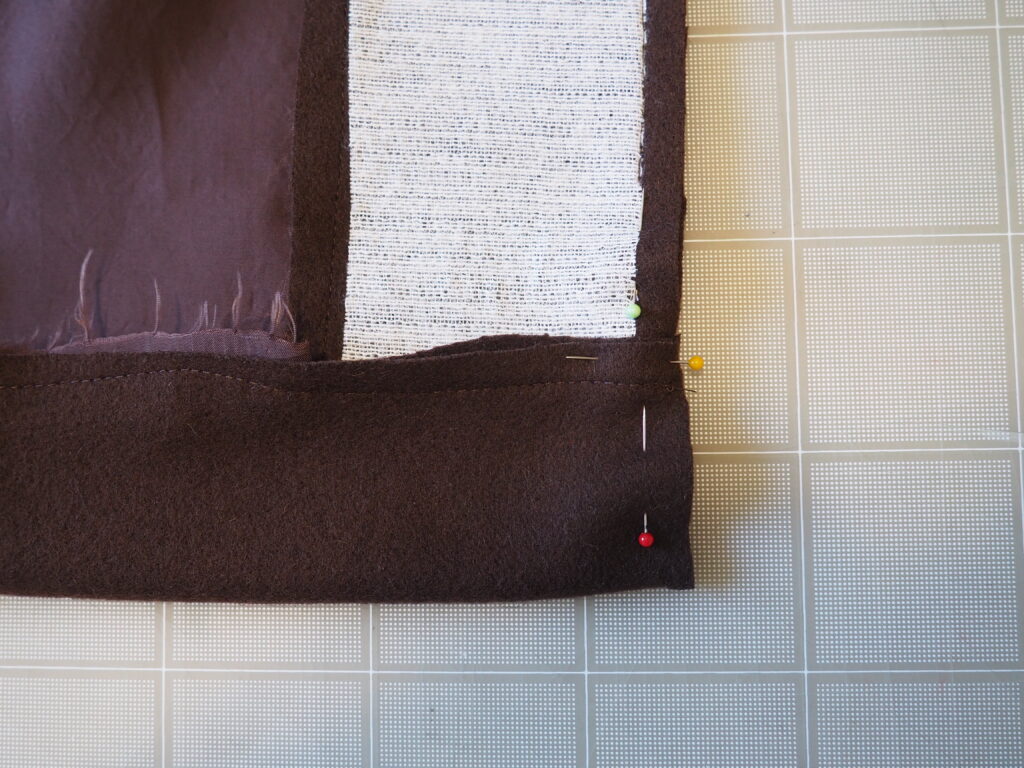
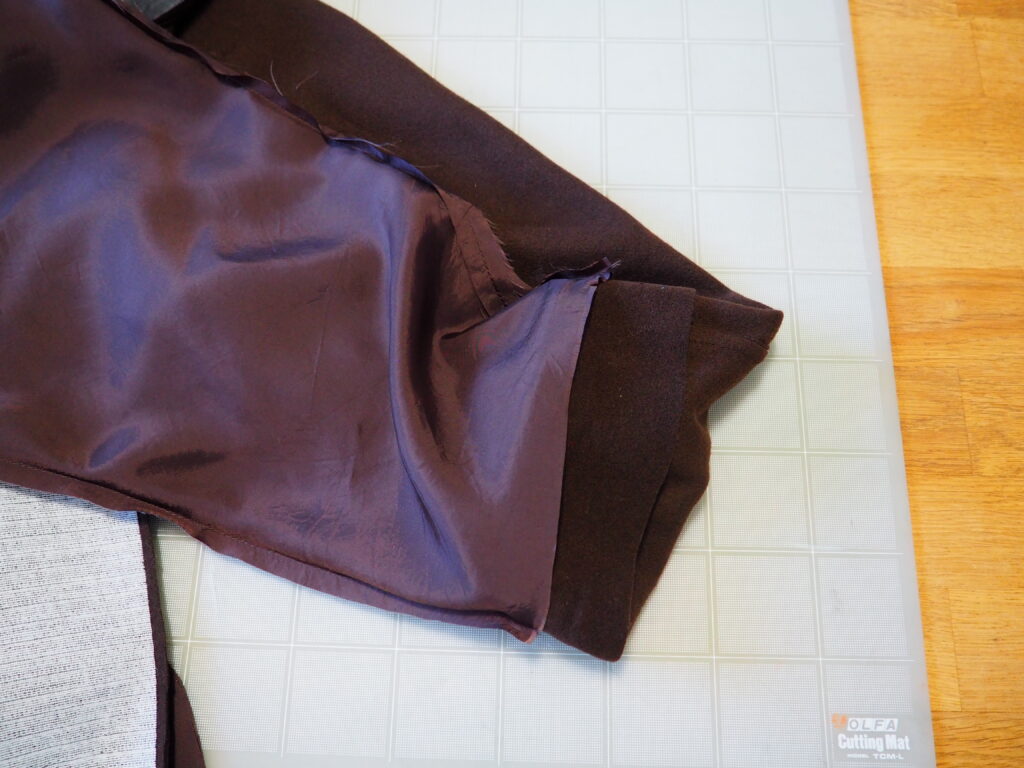
The next part is a bit tricky; I don’t think it’s technically how a lining should be attached, but this is a hack after all! Take the hem of the main body and align it right sides together with the bottom edge of the facing and lining pieces. (This is why it’s helpful to stop and start your stitching a couple of inches from the bottom of the facing). You will have a little loop of main fabric bunched up which we’ll sort out in the next step. For now, you can sew this seam making sure not to catch the pleat in your stitching, and press the seam allowance towards the lining.
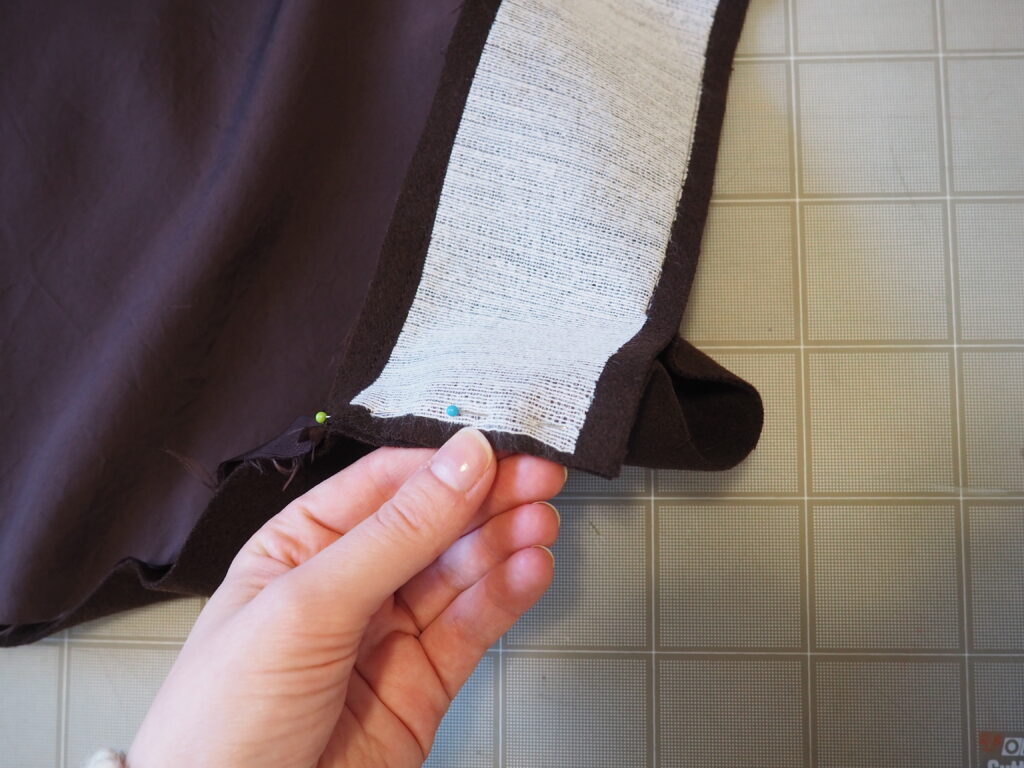
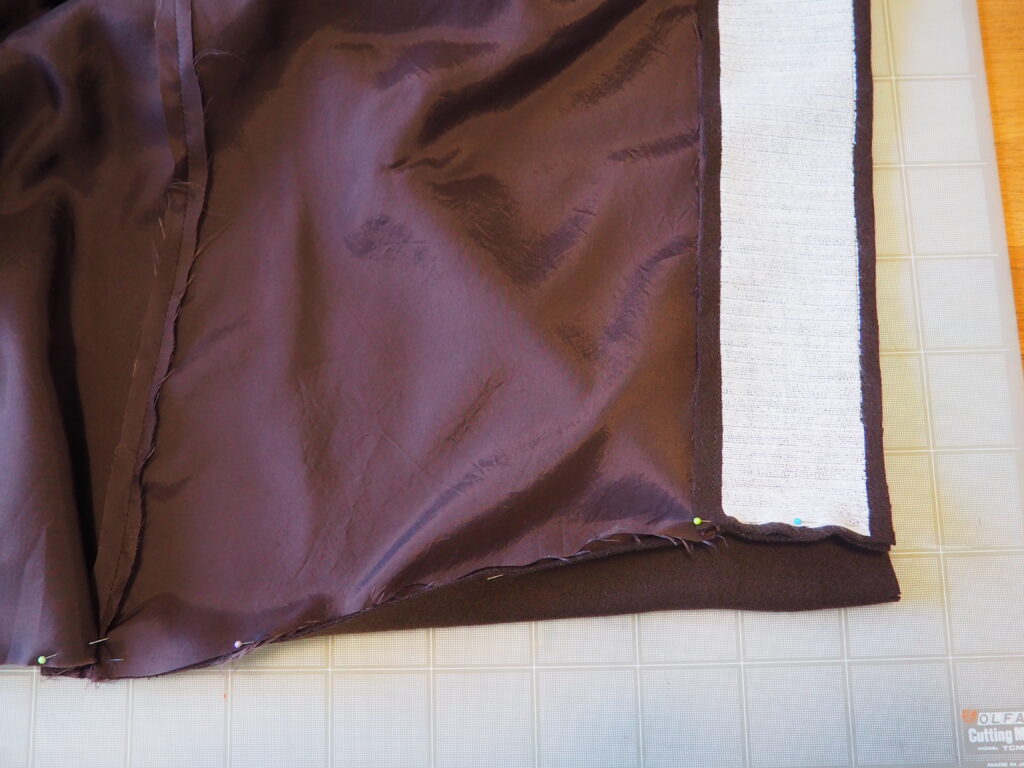
Now you can fold the hem up with right sides together at the notch and flatten the front bottom edge of the coat. Sew the gap closed using a 1cm seam allowance, making sure to overlap with your previous stitching line to ensure it’s fully secured. Trim away the bottom corners. I also chose to trim down the facing seam along the front edge to make topstitching easier later, but that’s optional.
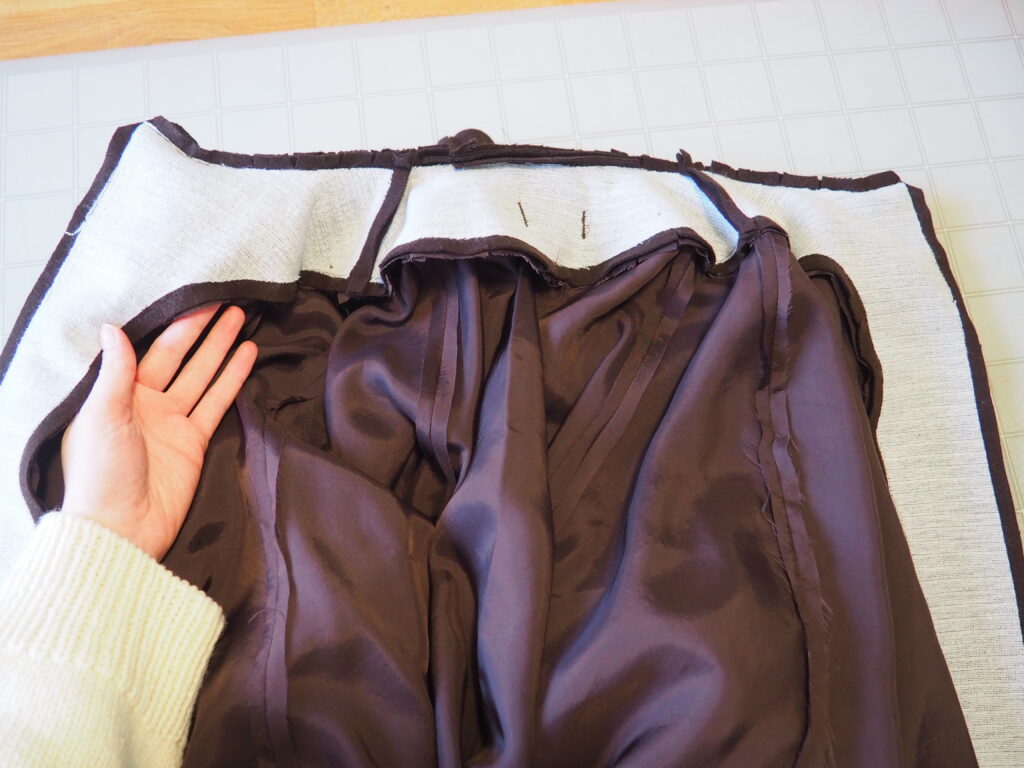
Finally, you can now bag out the lining. Keeping your coat wrong sides out, turn the sleeve cuff back towards the sleeve so that the right side is facing out. Insert the sleeve into the lining so that right sides are together and the cuff edges are aligned, matching the underarm seam to the facing seam. Make sure the sleeves aren’t twisted before sewing.
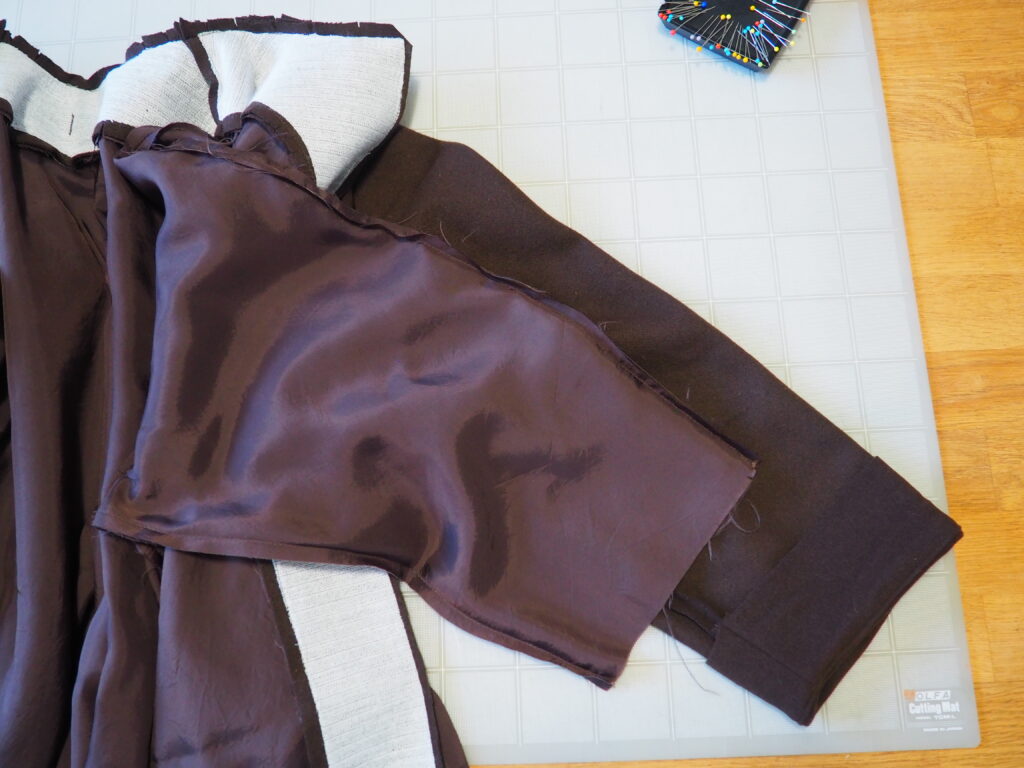
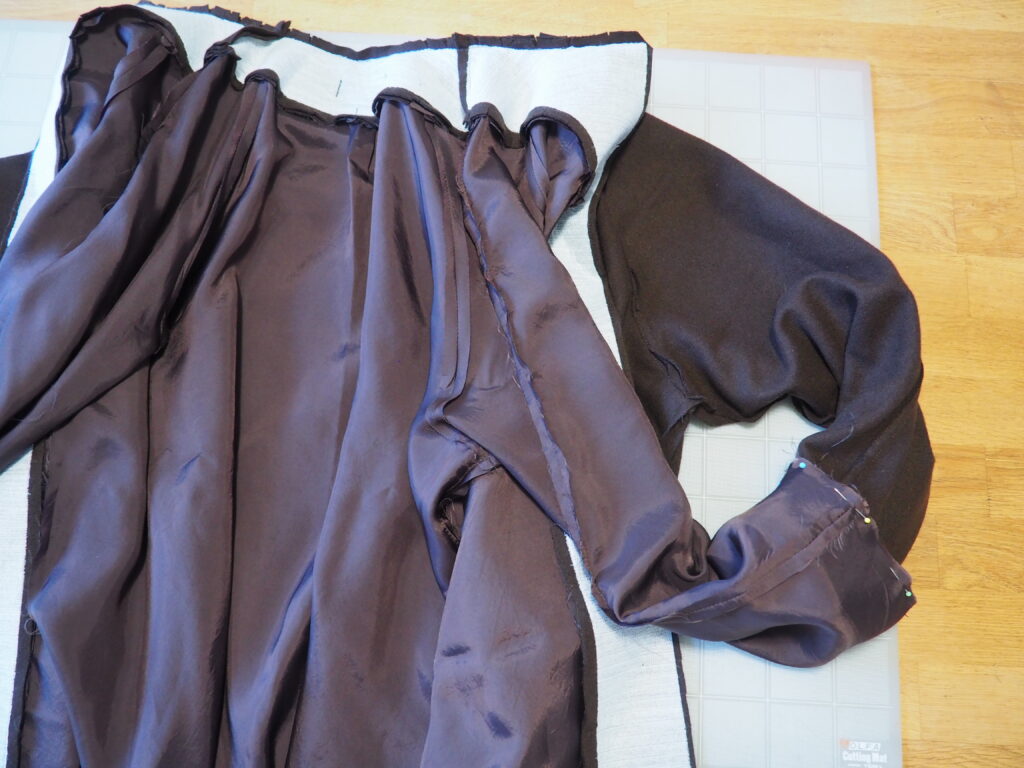
Now for the magic part: pull the entire coat through to the right side using the gap you left in the lining. Tada! Give everything a good press.
Now you can sew the opening in the lining closed. For a less visible stitch, I suggest hand stitching here, but I usually just use my machine and stitch close to the edge since it’s faster and won’t be visible from the outside.
Once that’s done you can go ahead and do all of the finishing details you like, including topstitching and adding buttons. For my version, I chose to just include 5 buttons and spaced them 16cm apart to be closer to my inspiration photo.
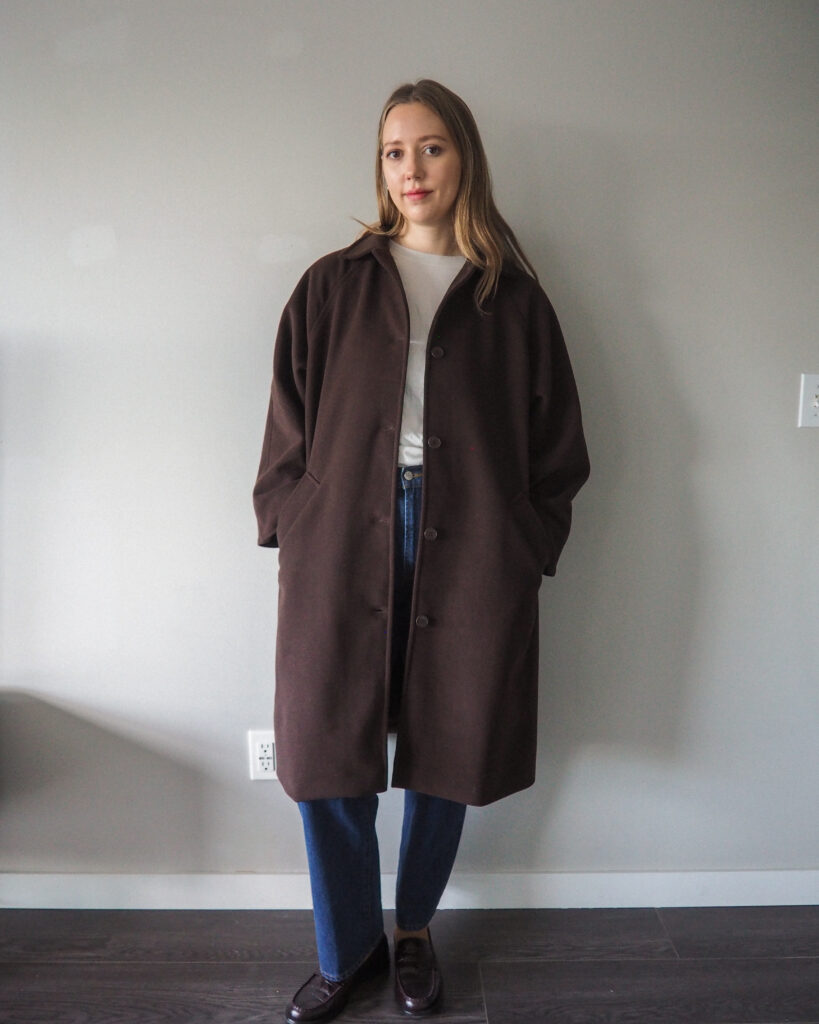
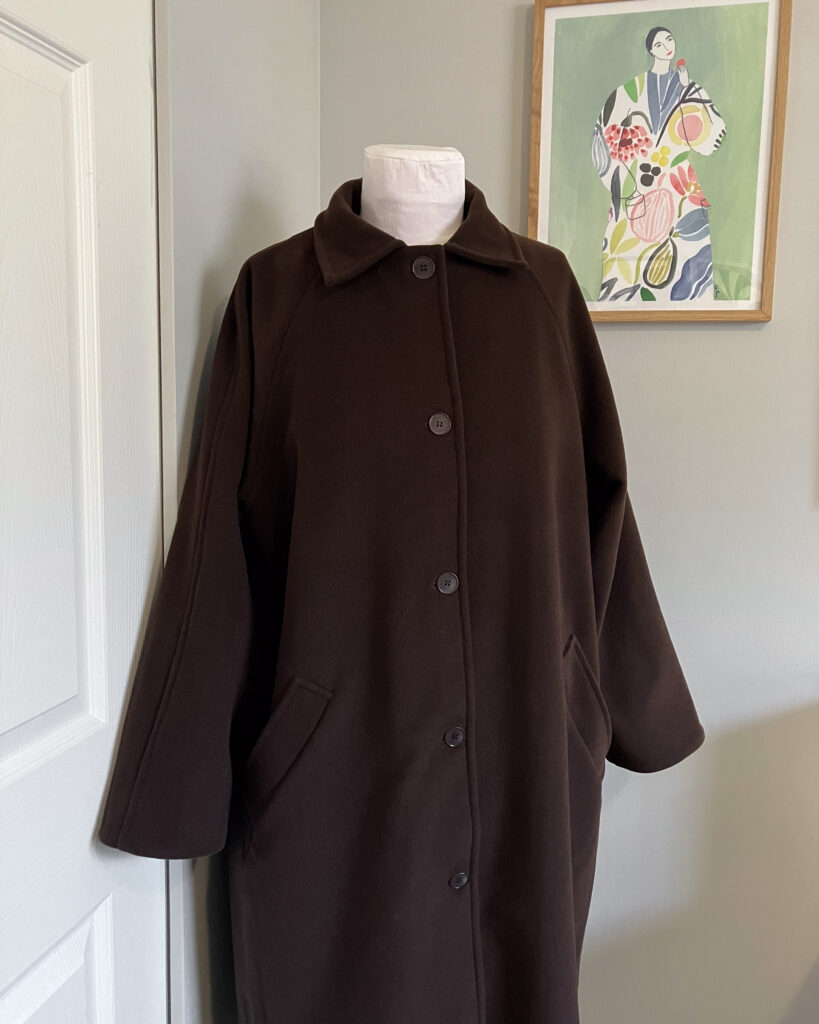
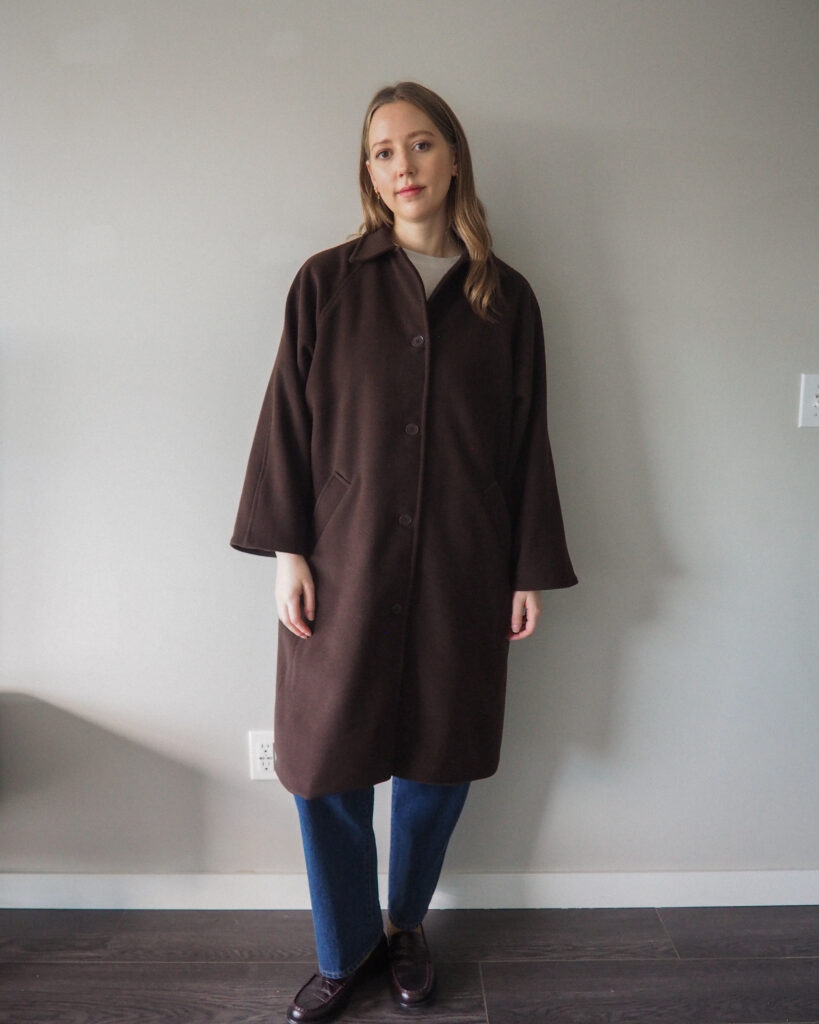
And here’s another look at the finished result:
I hope you enjoyed this tutorial and found it helpful and inspiring for your own makes. If you have any questions about drafting the lining or the sewing process, feel free to leave them in the comments below. And, let me know in the comments if you’d rather I just make a lining expansion pack for the Marzipan pattern which is something I can definitely do in the future!
Thanks for reading,