
In this article I’ll be doing a full review of the Bellbird Wrap Dress pattern by Common Stitch, including any adjustments I made, what I might do differently next time, and what I think of the end product!
The Pattern
This was my first time doing a pattern by Common Stitch. I found the instructions overall easy to follow. I did the print at home version, and didn’t really like how each page had a margin on all four sides – I didn’t want to spend time at the copy shop using the paper cutter amidst the pandemic, so I just tried to overlap them as best I could when assembling it.
I also found the instructions a little lacking in some areas, like when it came to finishing and pressing the seams. I had to think ahead about how I wanted it to end up, especially when it came to the side seams with the waist tie opening and pockets. I ended up pressing the side seams open from the armholes to the pockets, and then to the front from the bottom of the pockets to the hem so that the pocket would lie flat in the forward position.
Fabric
For this pattern, I used the IL019 Signature Finish Bleached Linen from Fabrics-Store.com. It’s a medium weight linen, so it’s a little sheer, but lovely and light for this style of dress. I ended up using a little less than the pattern called for because of how I cut it out to reduce textile waste.
Sizing
I cut a size AUS 12 based on my bust measurement. My hips placed me in a larger size but since it is a wrap dress with a sort of flared fit, I was hoping it would end up okay, and I’m happy with the result. I would definitely recommend going by bust measurement for this one and not sizing up to hips if they are larger because of the boob gape issue (more on that later!)

Adjustments I made
I didn’t make any drastic adjustments to this pattern since it was my first time using it. However, I did make a few small tweaks that I felt were necessary. Here are the adjustments I made:
- Cut two pairs of pockets (the pattern only called for one pocket on the side opposite the waist tie opening, but I was able to fit one on that side as well).
- Cut the binding parallel to the grain (as opposed to perpendicular as the pattern called for) to save on fabric waste.
- Also cut the binding a little longer than the pattern called for. It’s a big pet peeve of mine when things like bindings don’t fit, so this is something I do with all patterns to make sure I don’t need to cut it again.
- Before I started assembling, I used my serger to finish the edges of the pockets, side seams, arm holes, and bottom hem. The shoulder seams were the only ones I finished with the serger together after sewing.
- I stitched the shoulder seams first, then I draped it over my shoulders to loosely adjust the pockets placement. I ended up completely disregarding the notch for the pockets on the pattern, and my pockets ended up a bit higher.
- Finally, I also adjusted the position of the waist ties and opening on one side to fit around my natural waist. I ended up having to attach the waist ties higher than the curve than the front pieces (instead of just below the curve) because otherwise the area around my chest would hang open and be loose (aka the boob gape issue). I’ve seen a lot of other reviews comment about this so I think it may be an issue with the pattern. Once I had adjusted the straps, it worked out fine although my bottom hem turned out a little asymmetrical which isn’t ideal – I would have preferred the hem to go straight across.
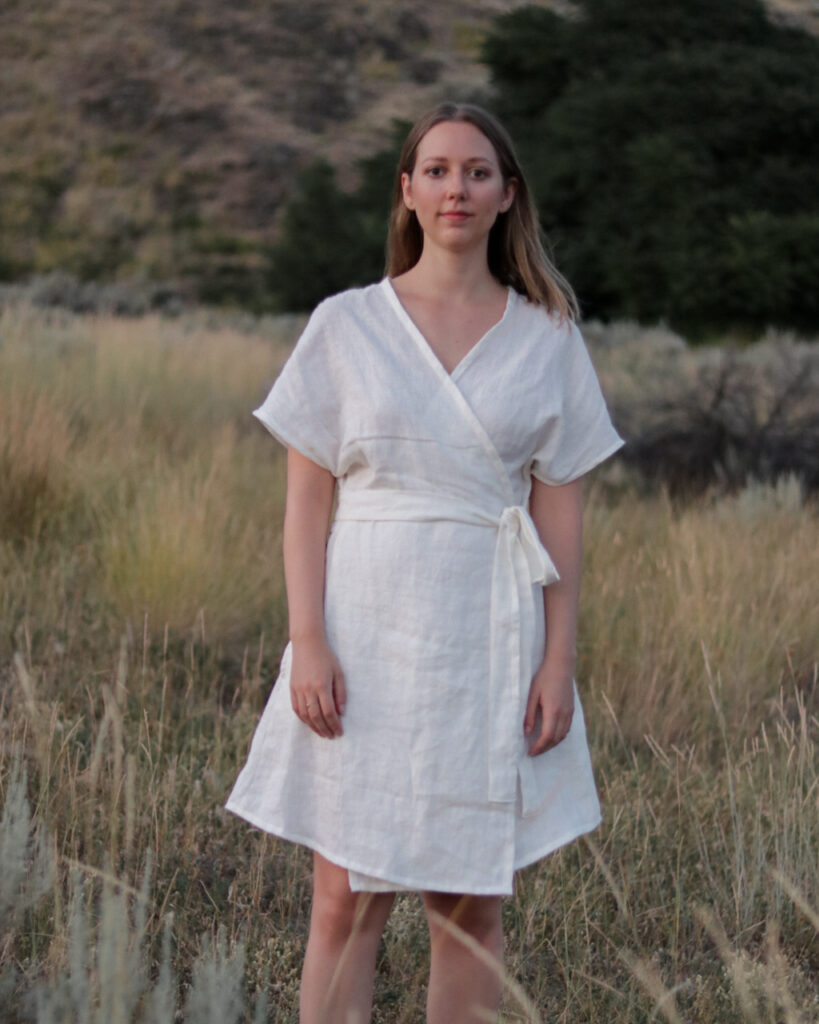
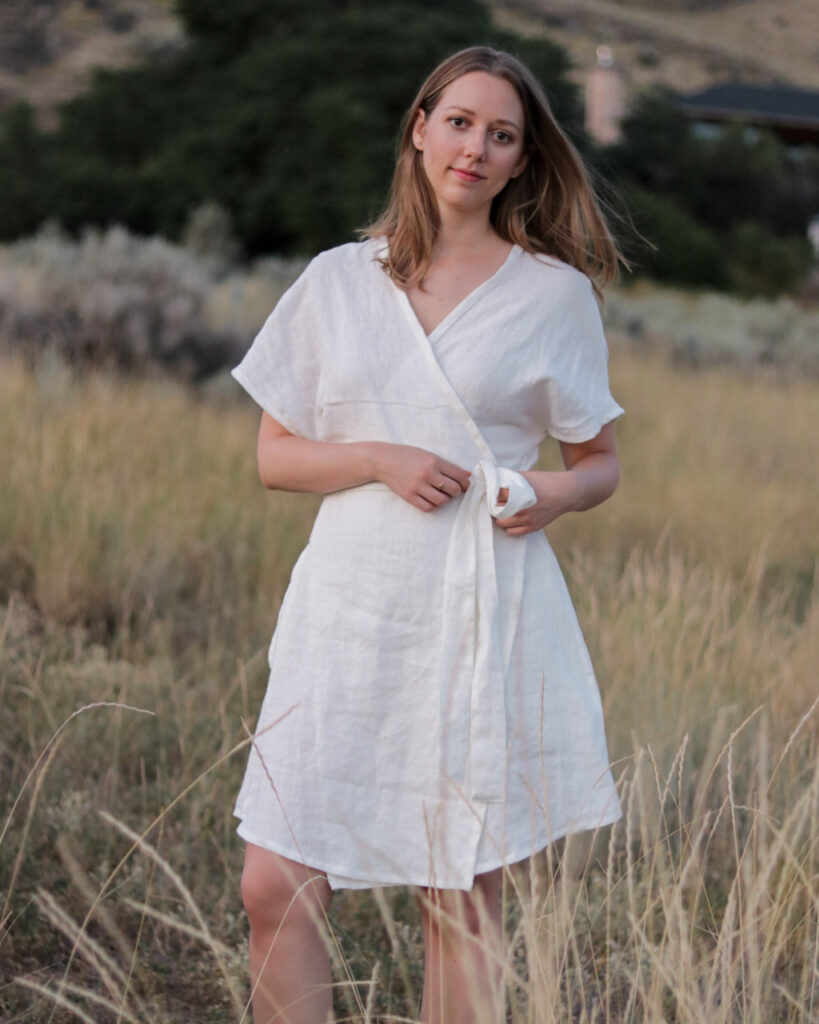
The end result
Overall, despite the minor issues I had with the chest area, I am quite happy with the end result! I was looking for an easy, throw-on summer dress to make from this beautiful linen, and this totally fits the bill.
Regarding the chest area, I wouldn’t know how to adjust the pattern to decrease it. I found that adjusting the waist ties worked well, although it did slightly throw off the hem. But I find once I’m wearing the dress and it starts to hang more off my shoulders, it’s not as noticeable. Pulling down the back of the dress helps reduce the issue as well.
Next time, I might try changing the way the binding is done – either doing a narrower binding, or flipping the binding to the inside before topstitching to hide it as I think I would prefer that look.
I would say this is a good pattern for intermediate makers, mainly because of having to do a very long binding and also the fact that I feel the pattern does require some adjustments to make it just right. It took me probably around 6-8 hours all in, including assembling the pattern and cutting.

I hope you enjoyed this article and that you found it helpful when making your own Bellbird Wrap Dress! If you’ve made it before, I’d love to hear what you thought of this pattern in the comments below. Also, let me know if you enjoy reading about sewing content! This was my first pattern review and as sewing is such a great hobby of mine, I’d love to share more of it with you.
Thanks for reading,

Em the white linen dress is stunning!! I love that you are making your own clothes. I wish I had my sewing machine in the UK with me ( not that I’m confident enough in my sewing abilities to make my own clothes )
Thanks Kristin! You could totally make your own clothes too, a lot of the patterns I use are really simple and easy 🙂 But yeah having a machine is pretty necessary haha.
I just finished making this in almost the exact same linen! When i read your comment about binding I was hoping you’d mention length, after i cut mine it ended up being about 3 inches too short! All in all I found it pretty difficult because this is only my 3rd pattern ever using. Just invested some more time but love the result. Yours looks amazing!!
I bet yours is beautiful! I agree it’s a bit harder than a beginner pattern, good for you! I actually don’t know the length I cut because I just cut to the end of the fabric I had available. I think it ended up being about 1.5-2 times what they recommended, so I had lots leftover. But I’d rather that than not enough!
Glad it’s not just me… I found the binding instructions quite confusing! I thought I had them right but I’ve just tried it on, and the seams flare upwards a bit, it’s almost like turning them under 1 more time would be a much smoother fit